Rovic RV1D Disc Golf Cart review at a glance
Overall
The verdict
While it takes a bit more effort to set up and break down, the Rovic RV1D disc golf cart is an absolute monster on the course, it makes rounds far easier and considerably saves your body.
I can absolutely recommend this for most golfers looking for a disc golf cart.
Pros
- Tackles the toughest terrain easily
- Works with almost any backpack
- Lightweight and easy to carry when collapsed
- Very stable on uneven ground
- Optional seat is great
- Lots of accessories available
Cons
- Takes a bit of extra work before and after rounds and takes more storage space when not in use
- Seat is an extra purchase
- No space for additional disc storage
- A bit more expensive than other carts, especially after adding on accessories
Disc golf carts are getting increasingly popular with growing adoption among players of all skill levels. Most carts are either enclosed box-like designs or open frames for existing backpacks and they’re designed to be pulled behind you. These designs aren’t always the best on rougher terrain and can be more hassle than help.
The Clicgear Rovic RV1D seeks to solve some of these issues, leaning on the company’s ball golf experience. I’ve been using the RV1D for several months now over a variety of courses and terrain and feel that I have a good understanding of the ups and downs of the RV1D cart.
What is the Rovic RV1D disc golf cart?
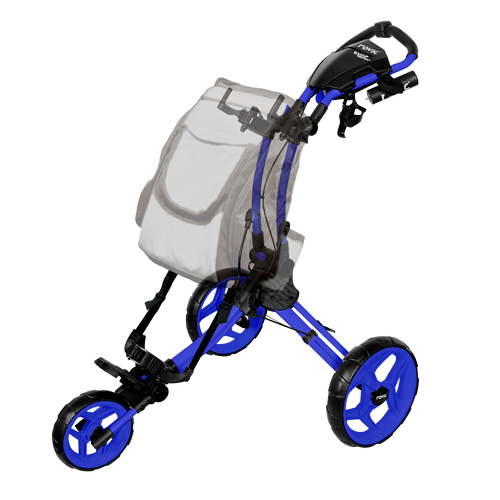
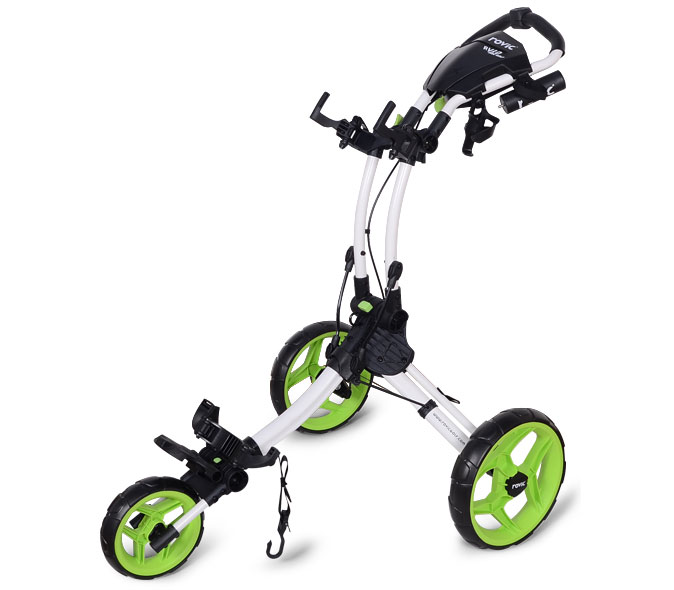
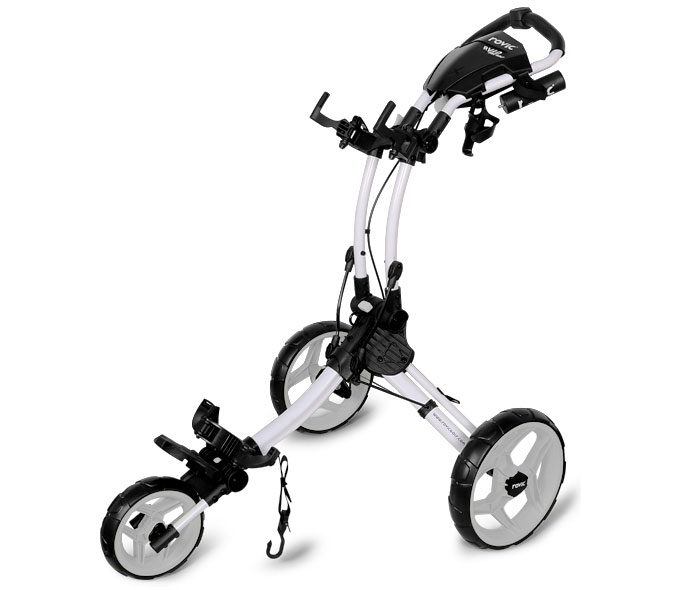
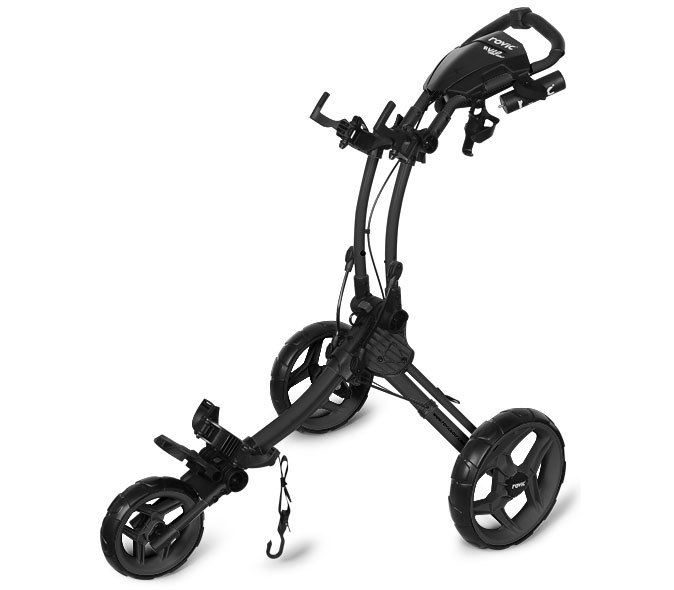
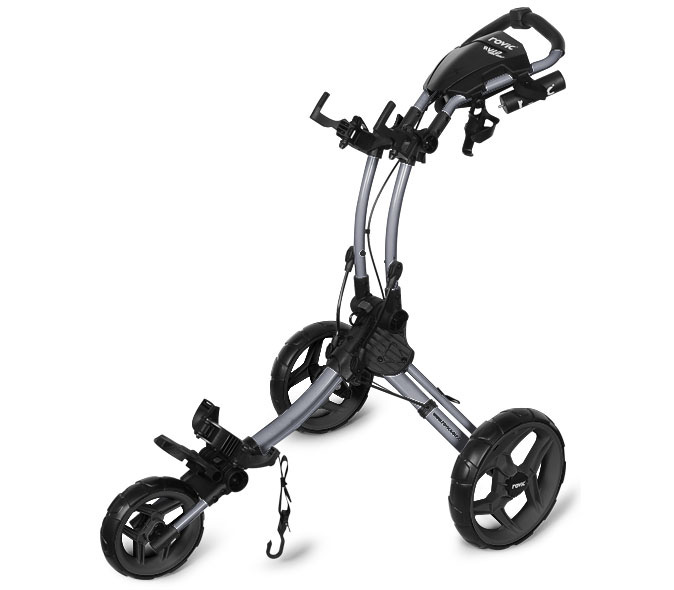
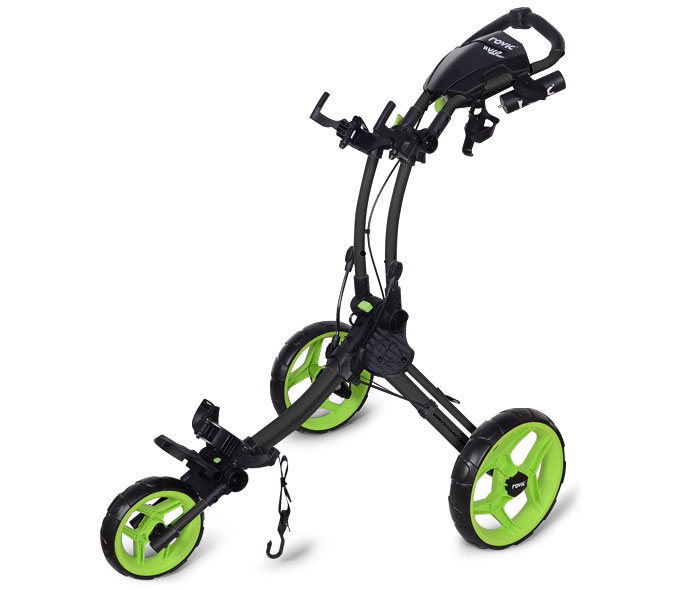
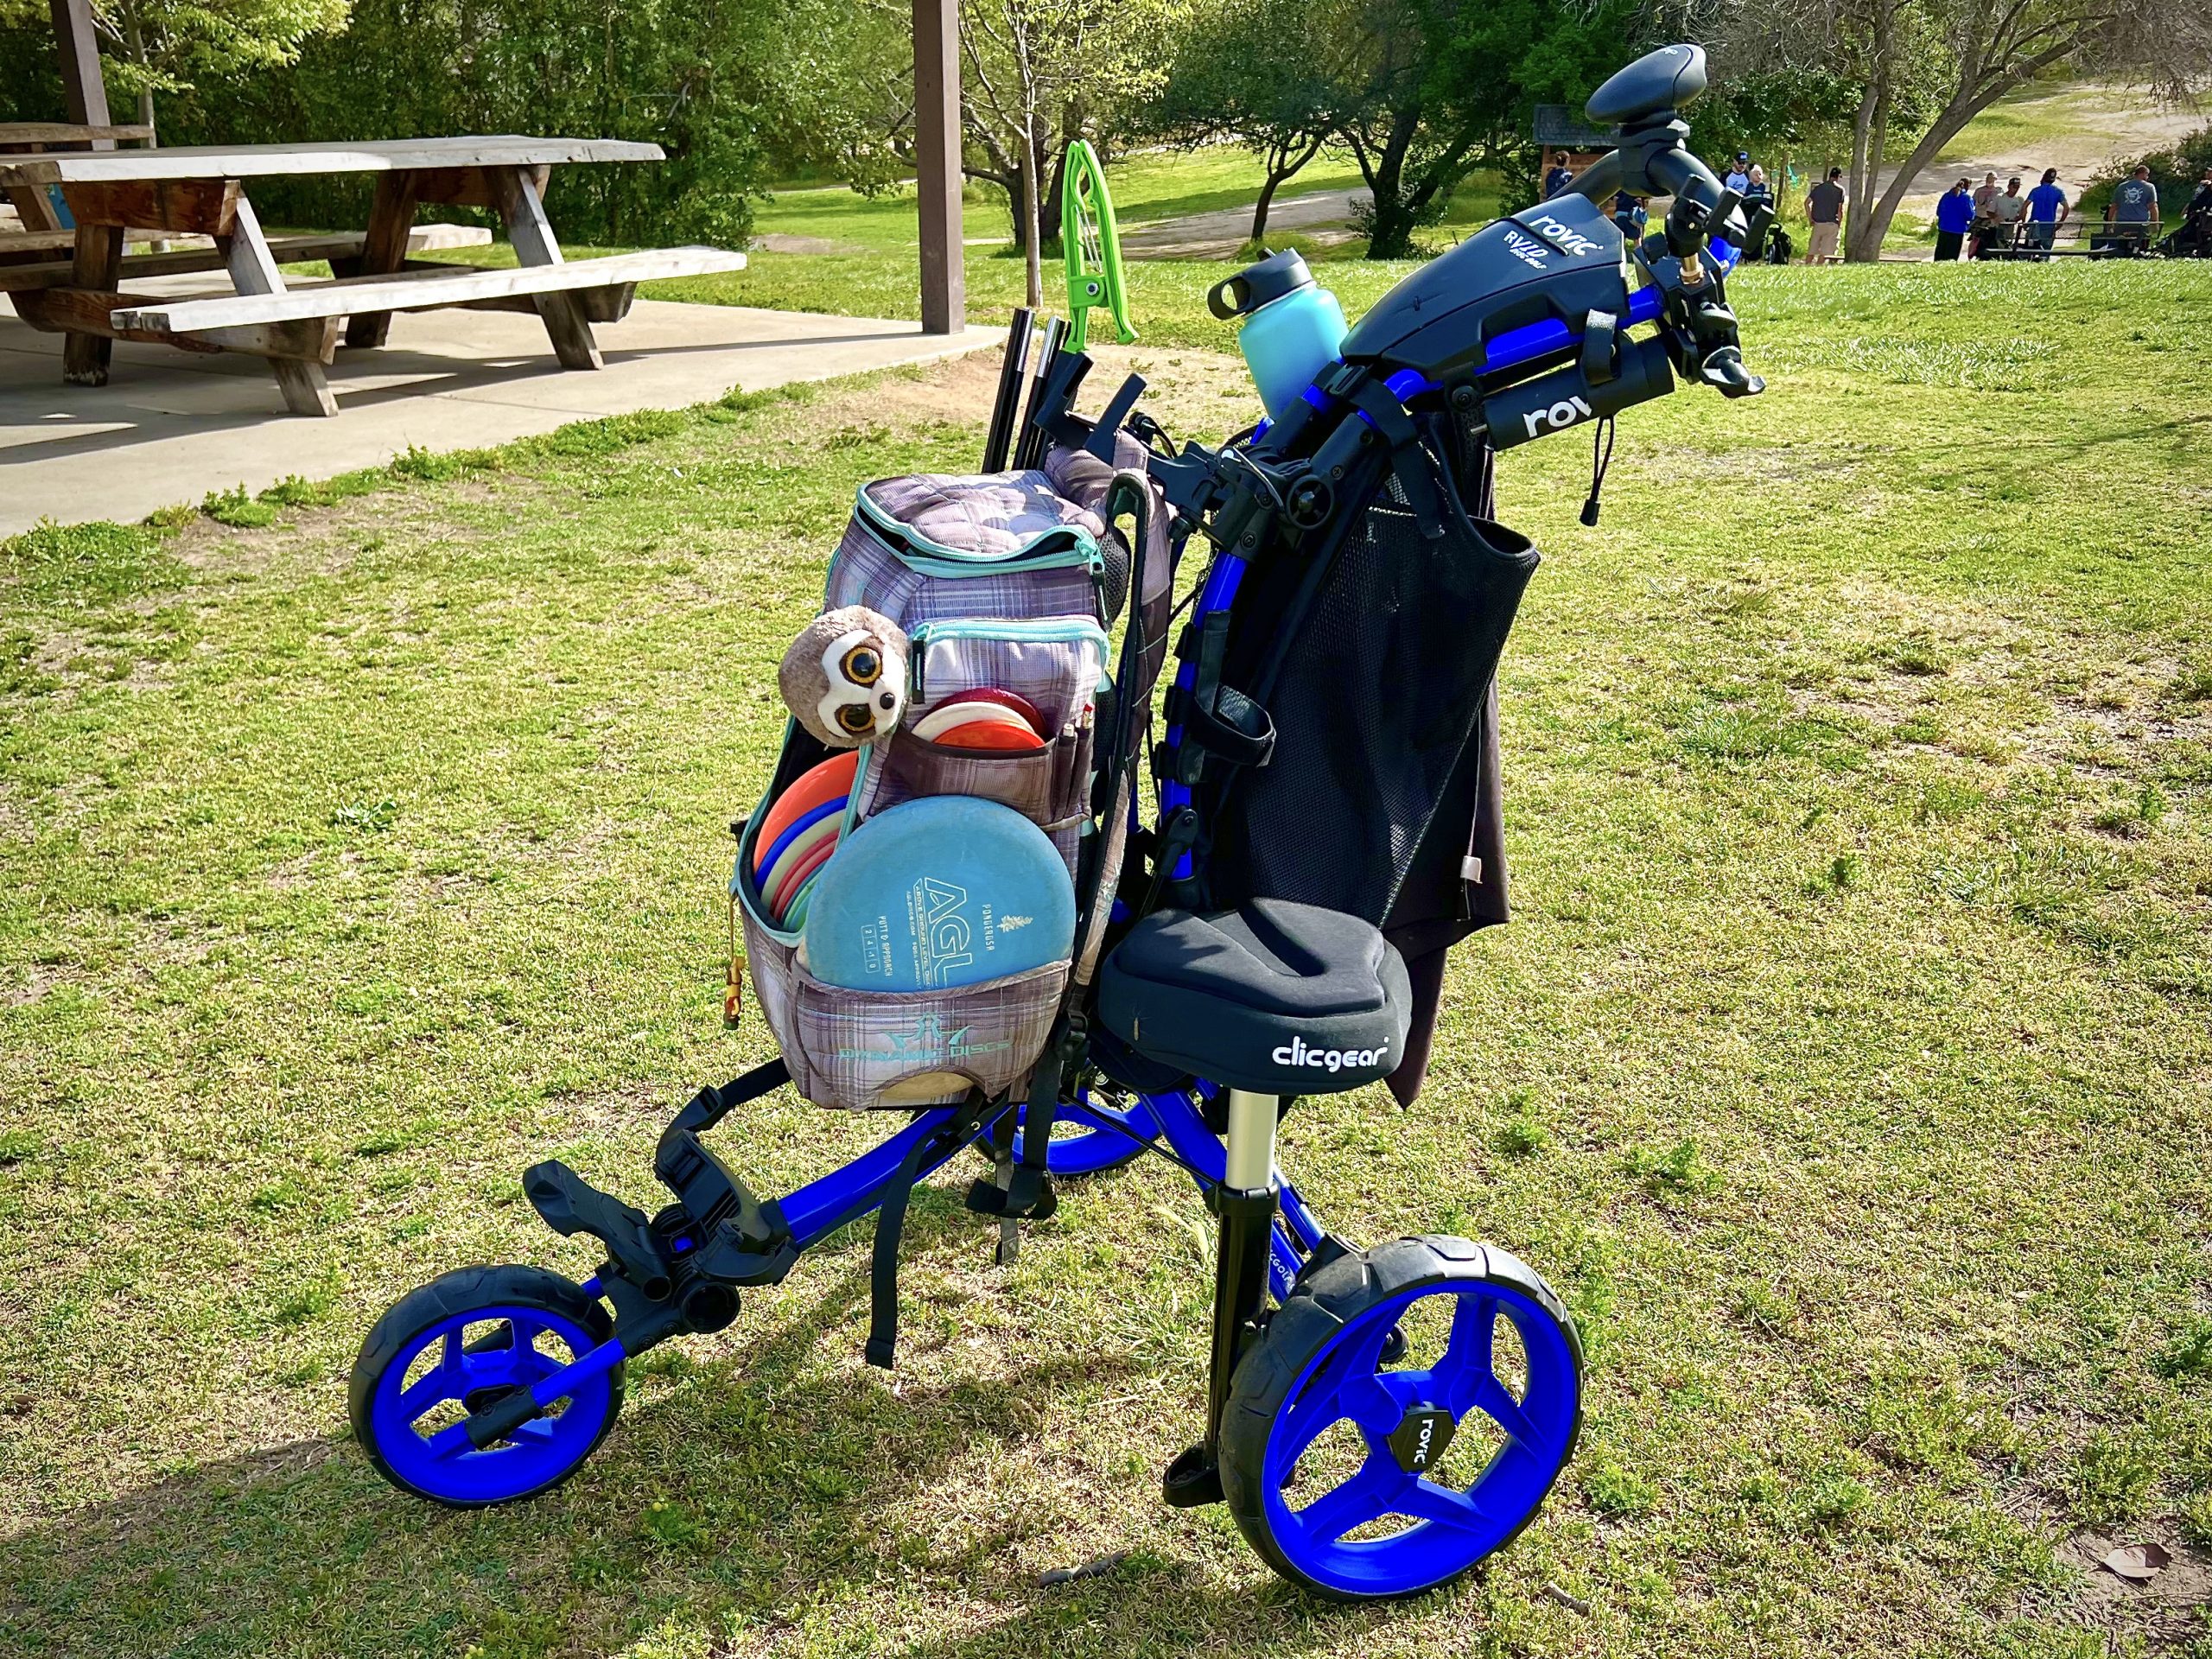
If you’re familiar with traditional golf bag carts you’ll be well-prepared for what you’re getting with the Rovic RV1D. The RV1D is a three-wheeled push cart meant to carry your existing disc golf backpack for you during your round.
The RV1D is almost exactly the same as the popular RV1C, their compact golf bag cart. The top half has been modified to replace the bag cradle and strap with a collapsible double-prong hook to hang your backpack from.
When not in use the RV1D folds up into a small, compact footprint not much larger than most full-sized backpacks. Its lightweight construction makes it easy to carry and fits into most car trunks along with your backpack easily.
Like the rest of the Clicgear/Rovic carts, the RV1D is available in multiple colors, but not all are available at all retailers. Rovic doesn’t even have the blue listed on their site right now, but it is out there.
What comes with the Rovic RV1D disc golf cart?
When you buy the RV1D you’ll get a few essentials but you’ll probably want to buy more accessories to flesh out your setup (more on that later).
You’ll get the cart, of course, but the best accessory it ships with is the XL cupholder. I was under the impression that it came with the regular size cupholder and bought the XL cupholder separately. Now I know that was unnecessary, but the upside: Now I have two cupholders!
It also will come with the basic umbrella holder. This is not the articulating one that they sell separately (they also sell the included one separately, for reasons), but it will get the job done in a pinch. It also includes a mounting clip so you always have the holder with you if you need it.
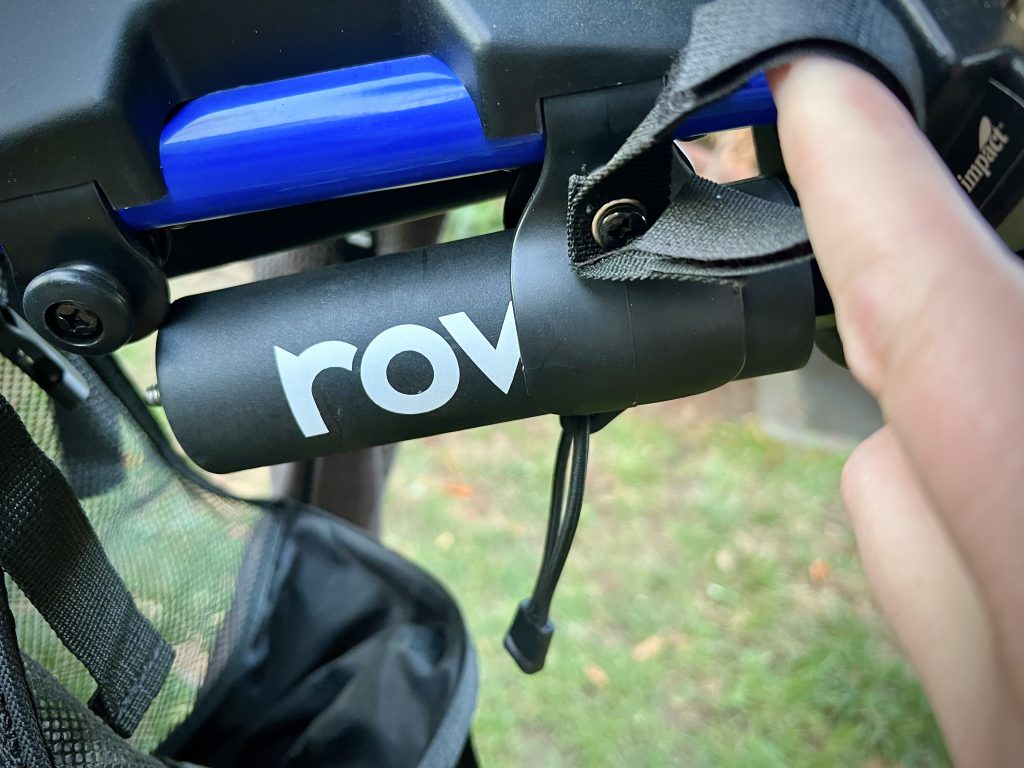
While not an actual accessory, the RV1D does have a built-in umbrella storage spot. It’s nice that you don’t need to spend extra for basic rain protection, but you may want to eventually spring for the articulating umbrella holder if you play in the rain frequently.
Who is the Rovic RV1D disc golf cart for?
Disc golf carts like the RV1D are extremely helpful for disc golfers who either don’t want to or can’t shoulder and unshoulder a backpack throughout their round. While it’s not as grab-and-go as a backpack alone, not needing to constantly lift a bag off the ground between throws can be quite a relief for some golfers.
I started using a cart to alleviate some pain in my right elbow. Being right-handed I almost always grab my backpack off the ground with that arm, and my elbow started to get a bit sore. Using a cart meant I no longer had to drop and pick up my bag every time I had to throw.
I’ve also developed knee pain in my right leg, and not having extra direct weight on that knee has been a bit better. Granted, there is an argument for replacing the direct weight of a backpack with the additional force required to pull a cart behind you or even push one in front of you, but it did seem to help at least a bit.
I also like the RV1D for more courses than smaller-wheeled carts, but I’ll get into that more later.
Features of the Rovic RV1D
The RV1D does more than just hold your backpack, so let’s take a look at what else it offers, starting with storage.
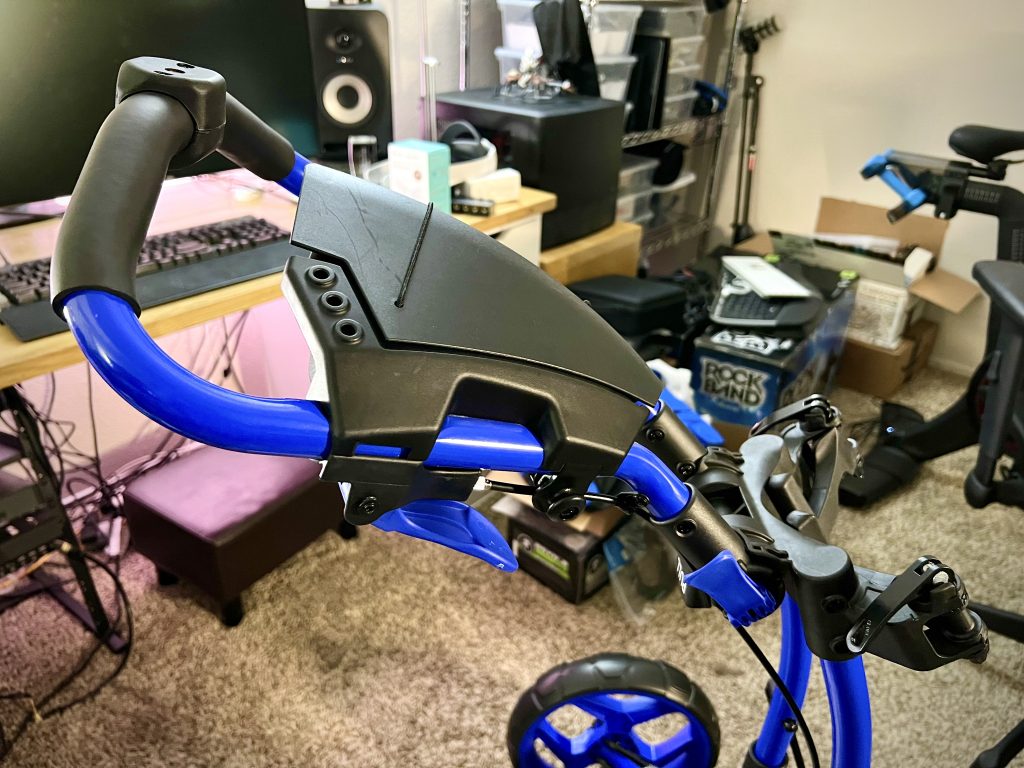
In the handlebar assembly is a plastic storage container in which you can keep your keys, wallet, phone, chalk bag, or whatever else you need. I usually have my chalk bag, electric handwarmer, work phone when I’m on-call, keys, and wallet in there. The lid stays closed quite well and I don’t have to worry about items falling out.
The lid to the compartment has two elastic bands on it, one for a paper scorecard and one for a golf pencil. It’s nice to have easy access to these despite more and more tournaments using online scoring.
The storage compartment also has a few holes for clipping a golf towel or three. You could also clip your bag tags here.
To keep the cart from rolling away from you there is a brake lever on the handlebar. This brake stops the right wheel from moving, which is actually enough to keep it in place. It’s easy enough to flip the brake lever as you roll up to your lie–half the time I grab my putter from the top of my bag and flip the brake with it.
The front wheel unfortunately doesn’t swivel, but the alignment is adjustable. Out of the box, my cart tends to push to the right. Adjusting the alignment is an easy process so you can easily resolve that issue. I finally remembered to fix this, and it was as easy as turning a screw near the wheel.
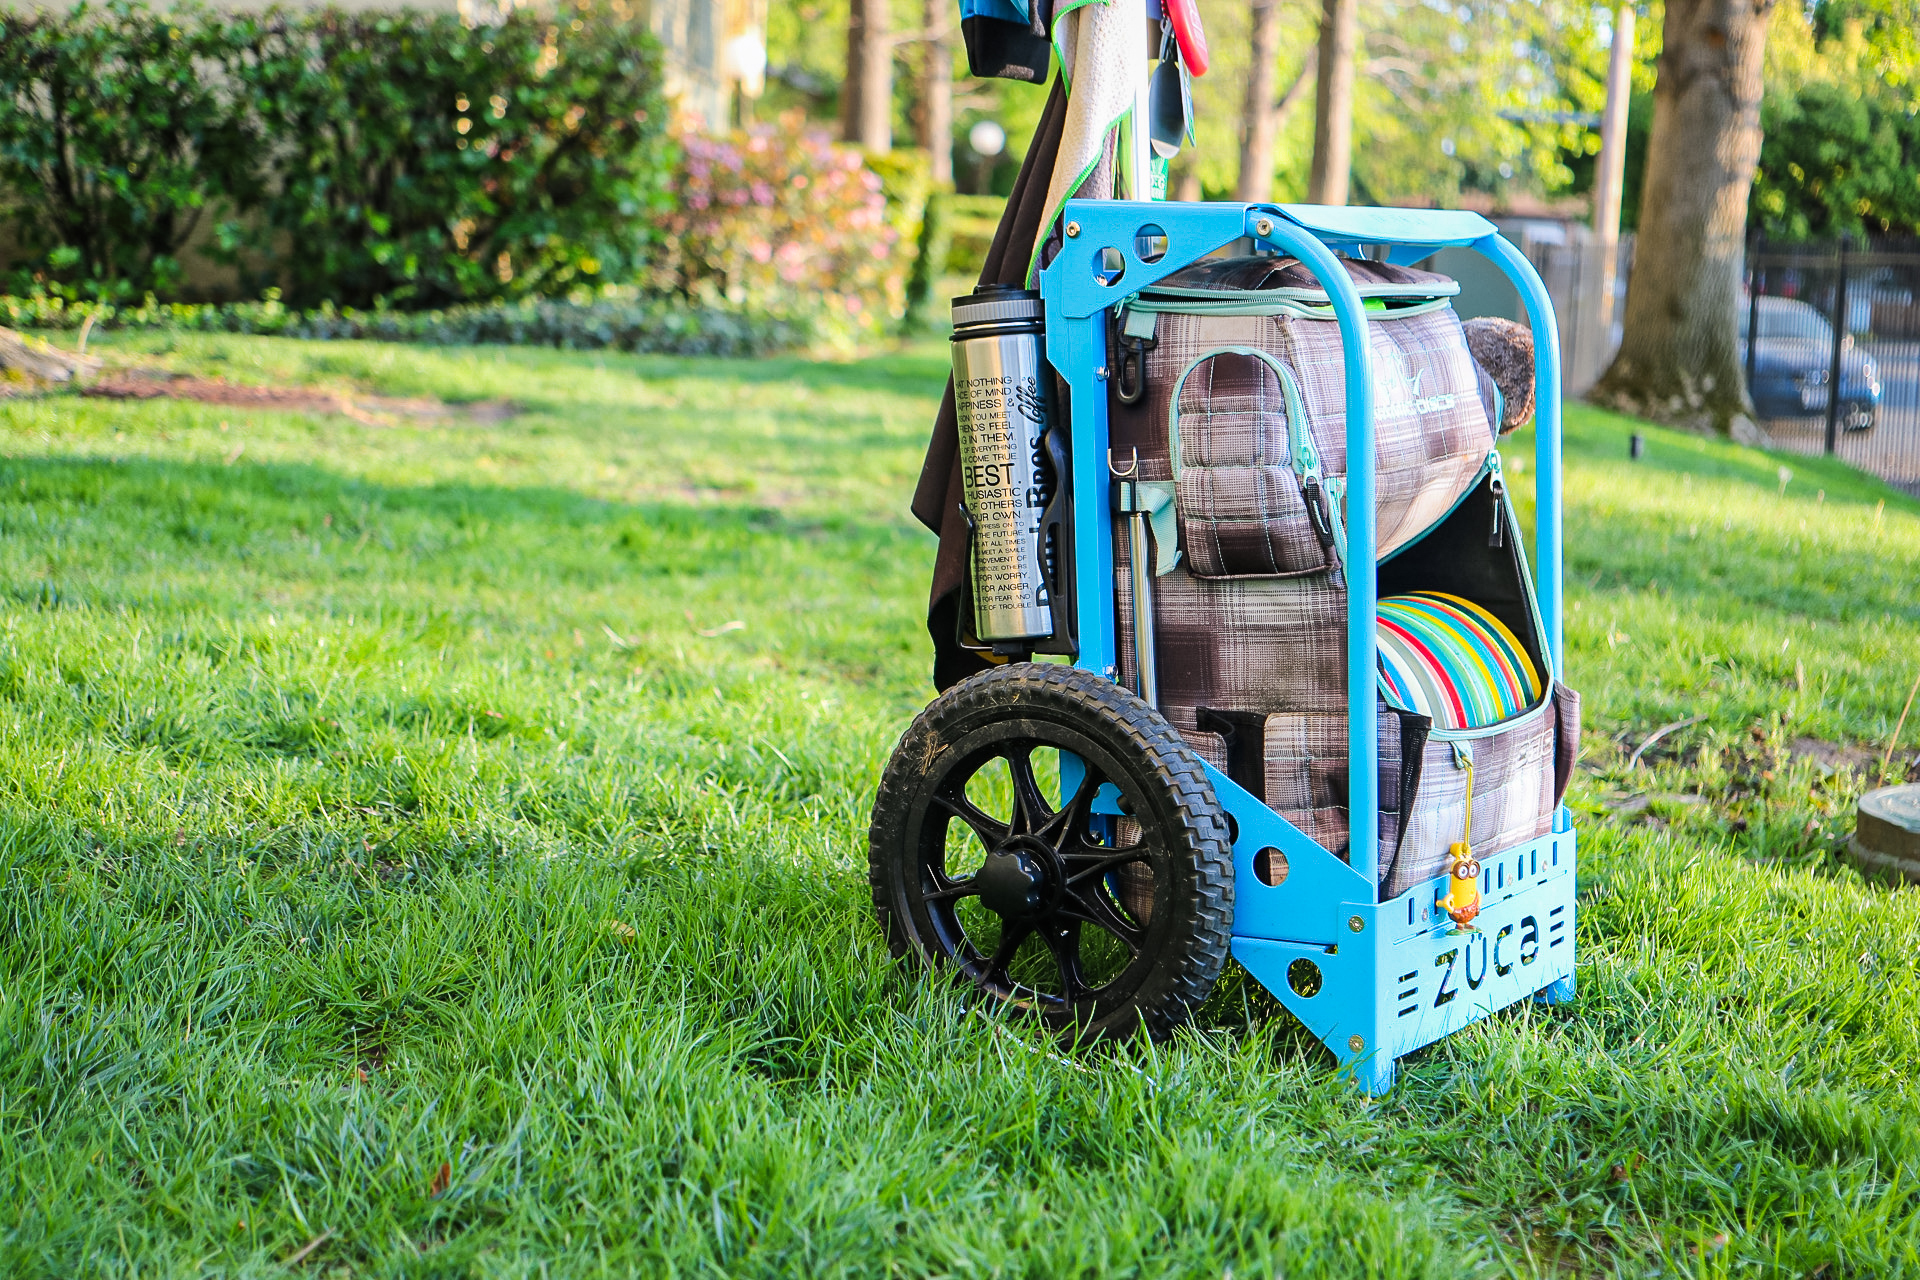
Comparing the RV1D to the Zuca cart
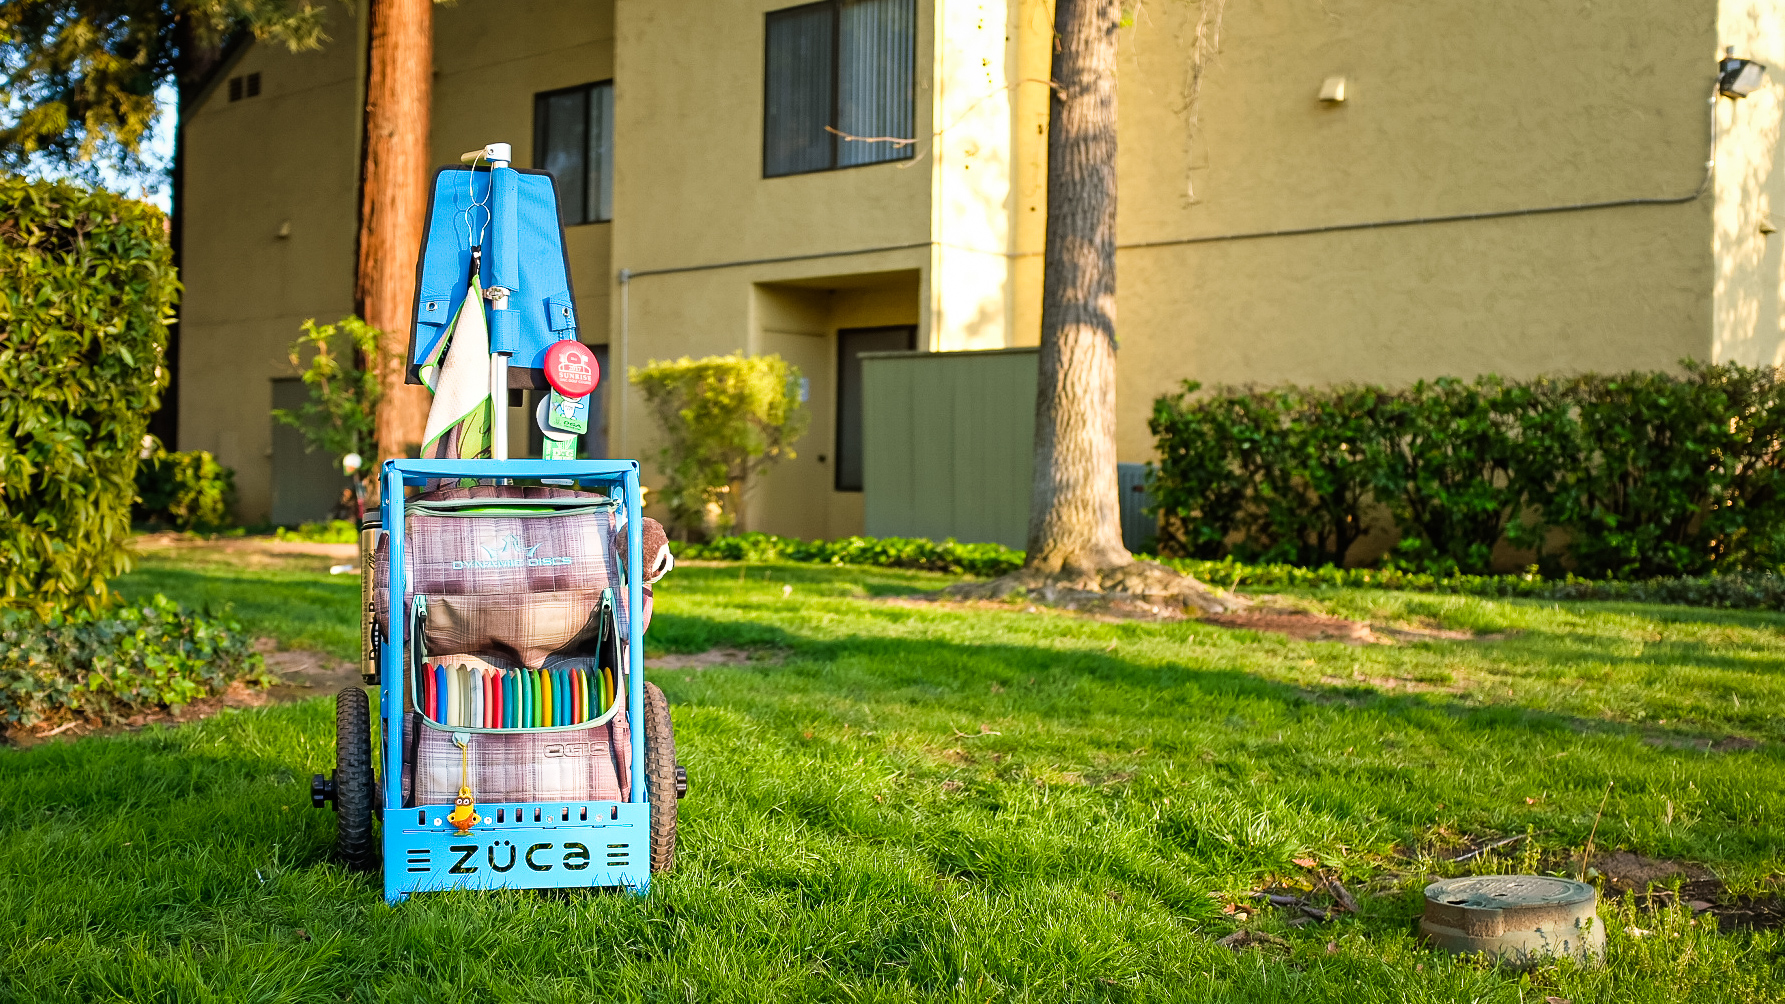
I’ve had a Zuca cart for a while now and enjoyed using it. While not without its drawbacks, it made most rounds much more convenient–something I covered in my Zuca cart review a while back.
Most cart users are more familiar with Zuca-style carts as they’re more prevalent on the course. So if you’re a Zuca owner (or debating between the two) there are a few significant differences between the two.
Terrain
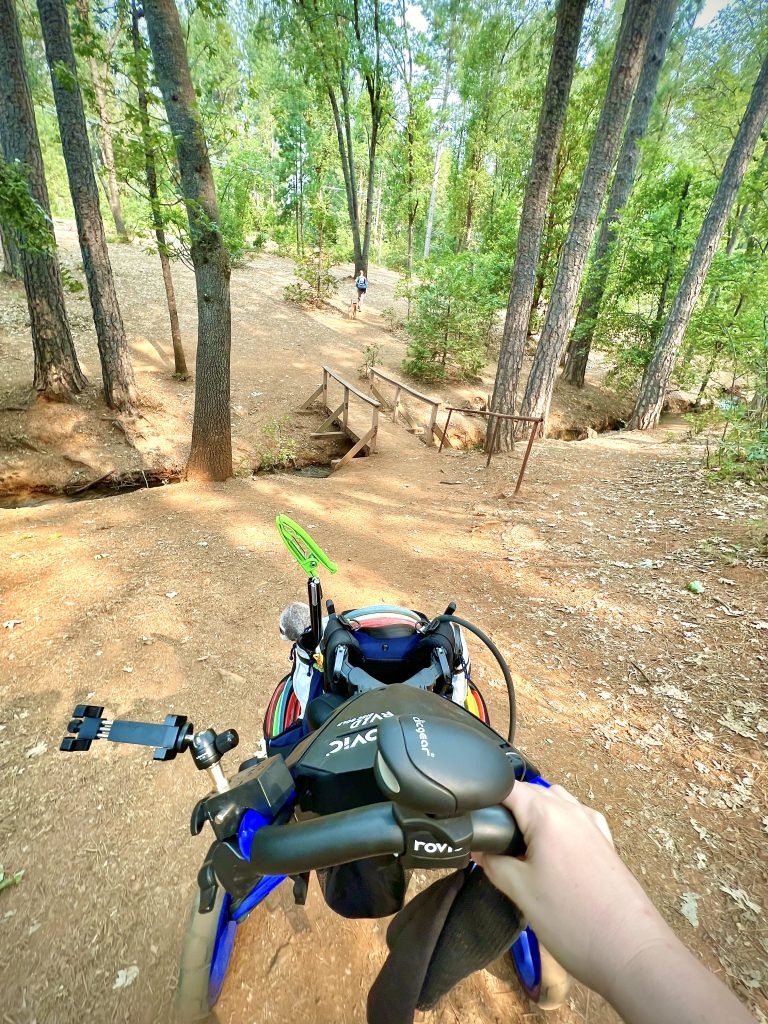
The major drawback of the Zuca (and similarly designed carts) is that it’s a bit tough on some courses and terrain thanks to its smaller tire size, wheel width, and ground clearance. Terrain like rocky paths, roots, grooves, ruts, and mud can prove challenging to a Zuca. It’s not impossible, but it’s not as easy as one would like.
With the larger wheels of the RV1D, you can easily tackle almost any type of terrain. If there’s any sort of course that the Rovid can’t handle you can be assured that the Zuca wouldn’t have a chance either.
Pushing vs pulling
Zuca-style carts can technically be pushed, but it’s easier to pull them because of their luggage-style use. Especially if you’re going over rocks or roots where pulling it just works better because, well, physics.
You can definitely pull the Rovic cart behind you (especially if you have the steering accessory), but it’s meant to be pushed like a stroller. Pushing a cart like the Rovic feels better to me in general, primarily because the Zuca has factors that work against it in a pushing motion.
Pulling the Zuca is usually easy enough, but it can get a bit awkward when going over roots and rocks. For me, it was always a pull on my shoulder that got a bit annoying, making me switch arms, and then switch to pushing, then get annoyed and go back to pulling the cart.
Personally, I prefer being able to easily push the Rovic cart (and pull if I need to) over pulling the Zuca (and pushing if I’m lucky).
Bag mounting
When it comes to a bag/cart combo, what is your preference? Would you like to have a flexible bag/cart pair that you need to set up every time you go to play or do you want a set-it-and-forget-it combo for those who never play without their cart?
When I used my Zuca cart, I almost never removed my backpack unless I was either not able to make room for the extra bulk of the cart or I was playing a cart-unfriendly course. This isn’t the most difficult process, but it does take a bit of effort to get the backpack out of and back into the cart.
This is probably my biggest downside with the Rovic as I typically like to have a ready-to-go rig with minimal setup. But now that I’ve had enough practice with the setup process it’s not a huge hassle to have to set up and then break down the cart.
This does ensure that my bag is always ready to go on its own, however, and also makes changing out discs a bit easier. I feel that the benefits of terrain handling well outweigh the extra time needed to install and separate the bag from the cart.
Stability
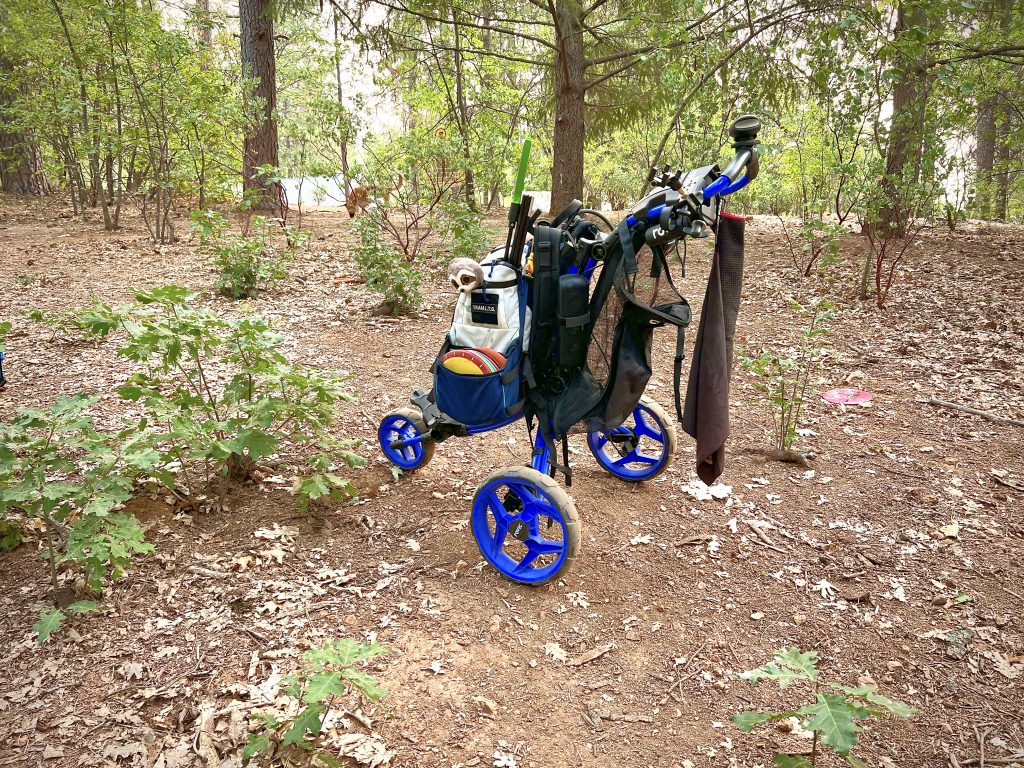
This is a category that the Rovic cart wins easily. Thanks to the increased footprint size the Rovic is much more stable than the Zuca cart. Yes, the Zuca has four points of contact to the ground, but those points of contact are much closer together than the three points of contact on the RV1D.
A smaller footprint of points of contact essentially creates a higher center of gravity. This means that skinny tall objects are more likely to fall over than shorter wider objects.
The Rovic cart also has a brake lever on the handlebar to make sure your cart won’t roll away if it’s on uneven ground. The brake works quite well and hasn’t failed to stop the cart from taking off on an incline.
Zuca carts don’t have a brake but instead rely on two of the four points of contact to the ground being immobile feet that the cart rests on when fully upright. When you tilt the cart back it lifts the feet from the ground leaving the cart only on the wheels.
The brake means that there’s one extra thing you have to do when you stop your cart. But if it means I don’t need to add extra attention to making sure my cart won’t tip over if on uneven ground it’s a step well worth it.
Portability
The huge win of the Zuca compared to the RV1D is how it’s stored and transported. The Zuca carts don’t require removing your backpack to store in your car or a corner of your room. If you live upstairs, you only have one item to carry down instead of two separate items even if one is on your back.
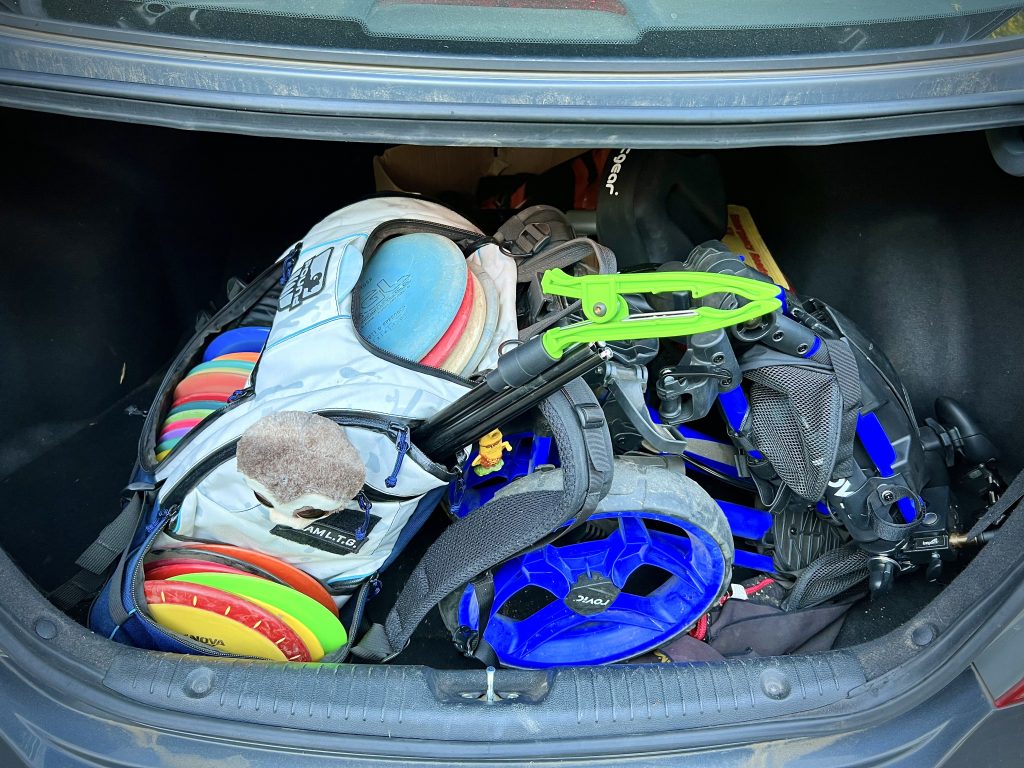
That said, the Zuca and backpack are considerably heavier than the RV1D collapsed down, which makes it more difficult on the stairs. There isn’t a single easy handle to carry the Zuca so you either hurt your hand on the small metal crossbeam or awkwardly two-hand the whole thing.
When you’ve got your backpack on your back and the RV1D in your hand it’s a lighter carry, which is great. Once you reach the bottom of the stairs, however, you’re still carrying the RV1D but you can start rolling the Zuca.
Disc storage
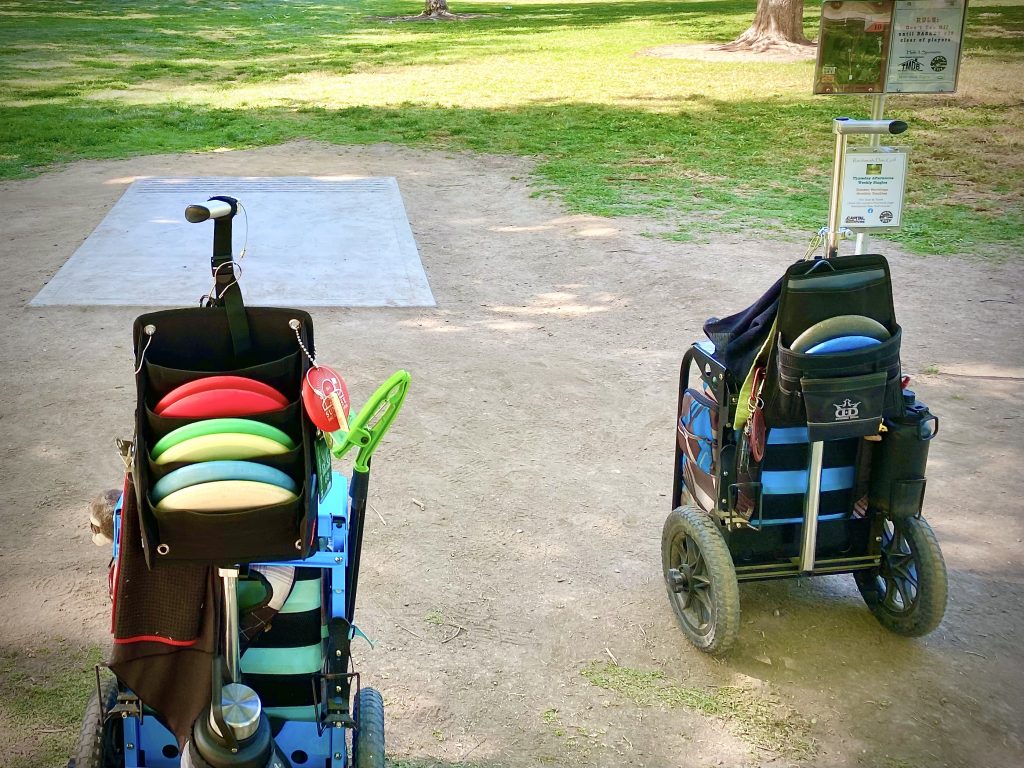
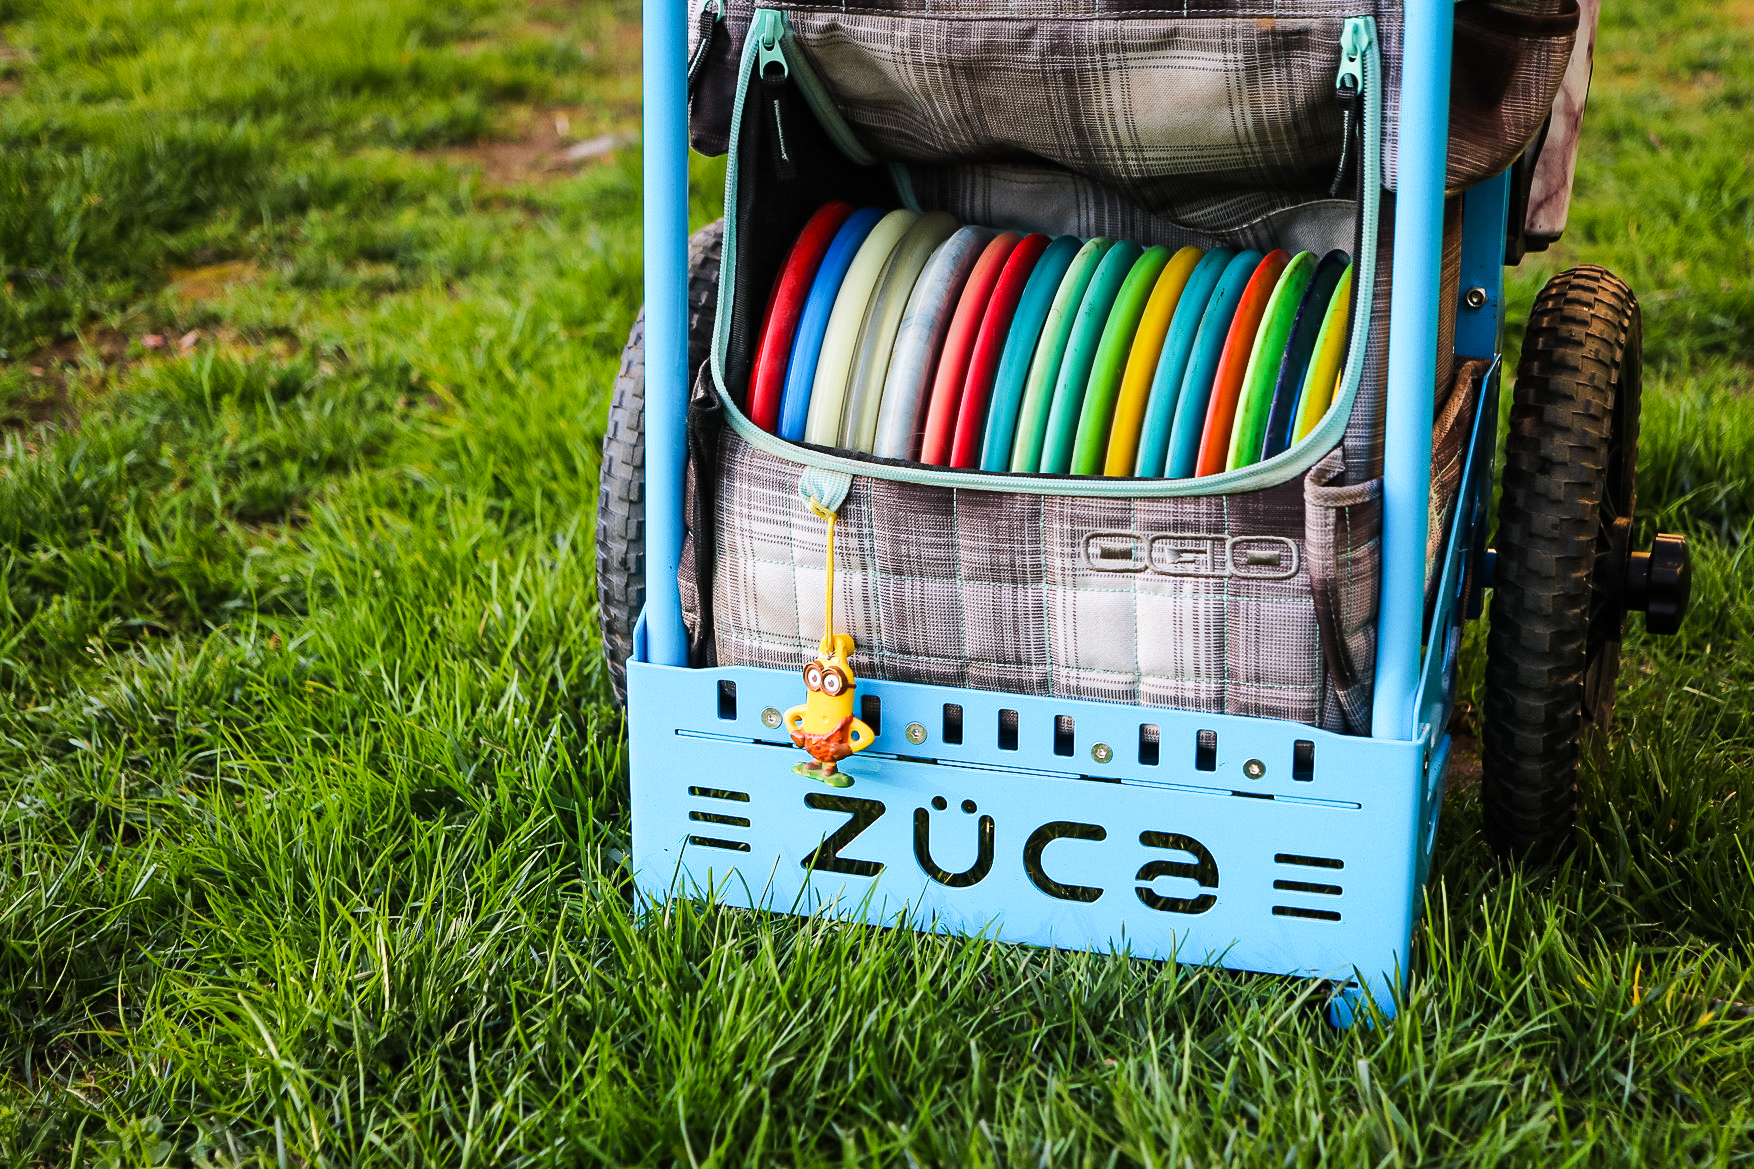
The Zuca does win on storage for extra discs. I bought the Dynamic Discs Zuca putter pouch when I got my Zuca and it was fantastic. I then upgraded to the Infinite Discs Power Pocket for even more storage. I know someone who has multiple Power Pockets on the frame of the Zuca for an absurd amount of storage.
While there are really no accessible disc storage addons for the RV1D, you can add a mesh storage back to easily stow away a jacket or loose random discs. I pretty much only use this for jackets being shed later during cold morning rounds, but you could put anything that wasn’t super heavy in it.
The lack of additional disc storage was really a bummer for me, as I do like to carry extra discs that I’m testing. I ended up buying a whole new bag that had additional storage space to make up for what I lost with my Zuca. It solved two problems–extra storage on the cart, and extra storage without the cart as well.
Hydration
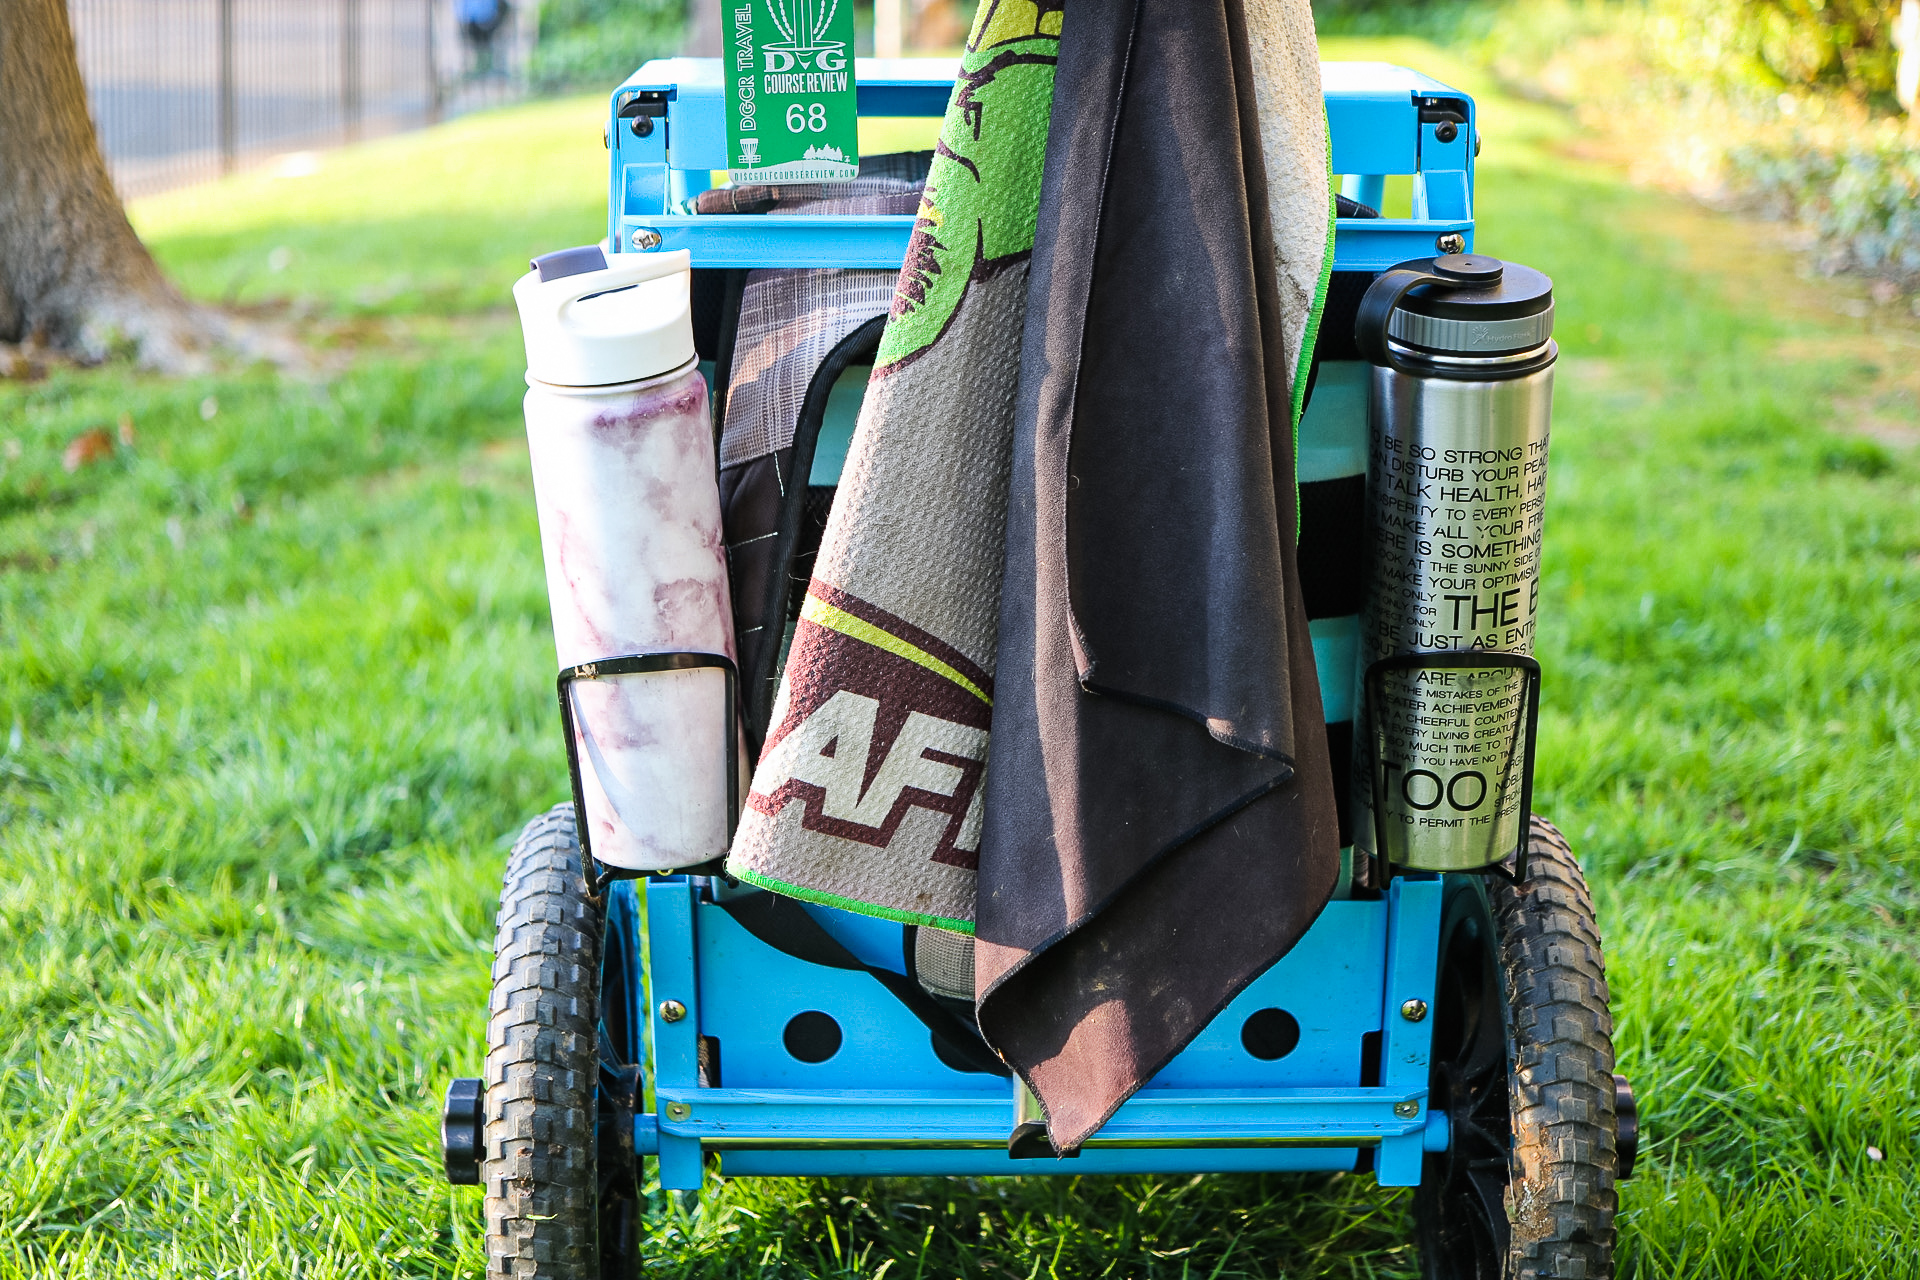
The RV1D comes with one of the XL drink holder accessories that clip on via the Clicgear accessory clips. You can add extras if you need to, but it will be extra. And they don’t hold smaller drink containers as well as the Zuca adjustable drink holders, but they will hold a 32oz or 40oz Hydroflask–something that I was quite surprised by.
The Zuca can’t hold a 32oz or 40oz Hydroflask without an upgrade. You’ll need to get the XL drink holders and replace the stock drink holders or get the accessory pouch. You can put a larger bottle in that pouch though, on hot or long days I would throw my 67oz HydraPeak in the pouch and it was perfect. A bit back-heavy, but I never ran out of water!
Seating
One of the benefits of carts with the Zuca-like design is that you always have somewhere to sit. It’s not always the biggest seat, but it’s always with you and that’s worth something.
The Zuca large backpack cart has a bit of a shallow seat so you have to be fairly careful when sitting, especially if the ground is uneven. But not having to be left out to dry if all the benches are taken is a godsend on long rounds.
While the RV1D doesn’t come with a seat, there is one available to buy separately as an add-on. It’s a hard plastic seat but there is a well-cushioned gel pad you can buy to slip over the seat.
Unfortunately, the RV1D seat needs to be removed in order to collapse it down, but it’s absolutely a better seat if you go through the effort of attaching it before your round.
Using the Rovic RV1D on different terrain
The major benefit to the RV1D is how well it handles less smooth terrain than other carts. The tires are larger, more spread apart, and there are three wheels instead of two so it’s much more stable on the ground when it isn’t level.
I’ve been pleasantly surprised at how easy the RV1D handles on different surfaces. Even sand, a bit of mud, and thick city park grass are no challenge for the wheels on this cart.
Sections of courses that would be a literal drag with my Zuca are nearly effortless on the RV1D. I rarely feel that it’s stuck on anything or gets tilted and wants to roll over while pushing through rough paths.
Speaking of paths, the RV1D is definitely wider than other carts and so it takes a bit of attention to cross footbridges over small creeks. It just barely fits on the bridges out at Shady Oaks, with inches to spare. But it will fit, you just need to pay attention.
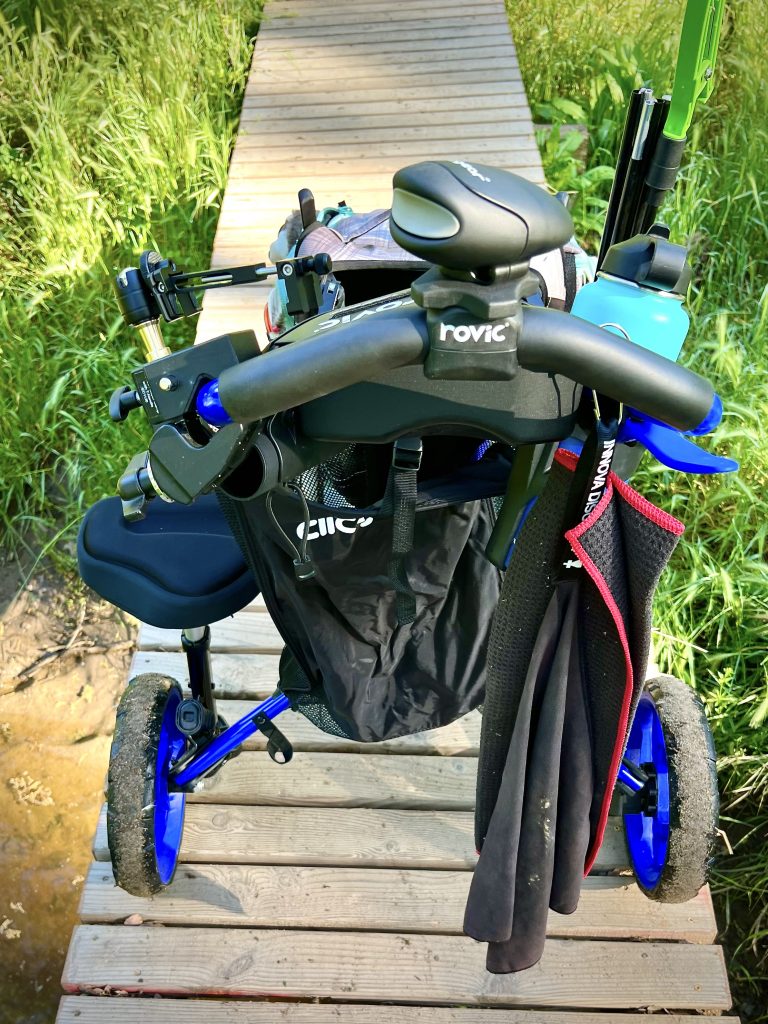
But back to the actual terrain, this thing just glides over it, whatever it is. I got the chance to play Lone Star up in Auburn recently and despite having some decent incline and a lot of rocky paths, the RV1D handled it all nicely.
It still took a bit of work here and there, but if I had my Zuca I would have been carrying it through these sections. Being able to push a cart through 27 holes with minimal issues was a godsend compared to pulling a more difficult cart or backpacking the whole way.
The RV1D also does quite well on uneven or inclined terrain. You may need to point it a certain way to engage the brake the right way, but it’s miles easier than trying to precariously balance a Zuca on its small footprint on a hillside.
What I like the most about the RV1D is that I almost never have to struggle with it to push down the fairway. I know that I can get through almost any terrain with minimal fuss which, to me, outweighs the extra effort involved with the cart.
I haven’t been able to make it out to Cameron Park Lake yet (probably the least cart-friendly course in the area), but I think it may actually be a pretty positive experience. I’ll update this when I do so.
Unboxing the RV1D
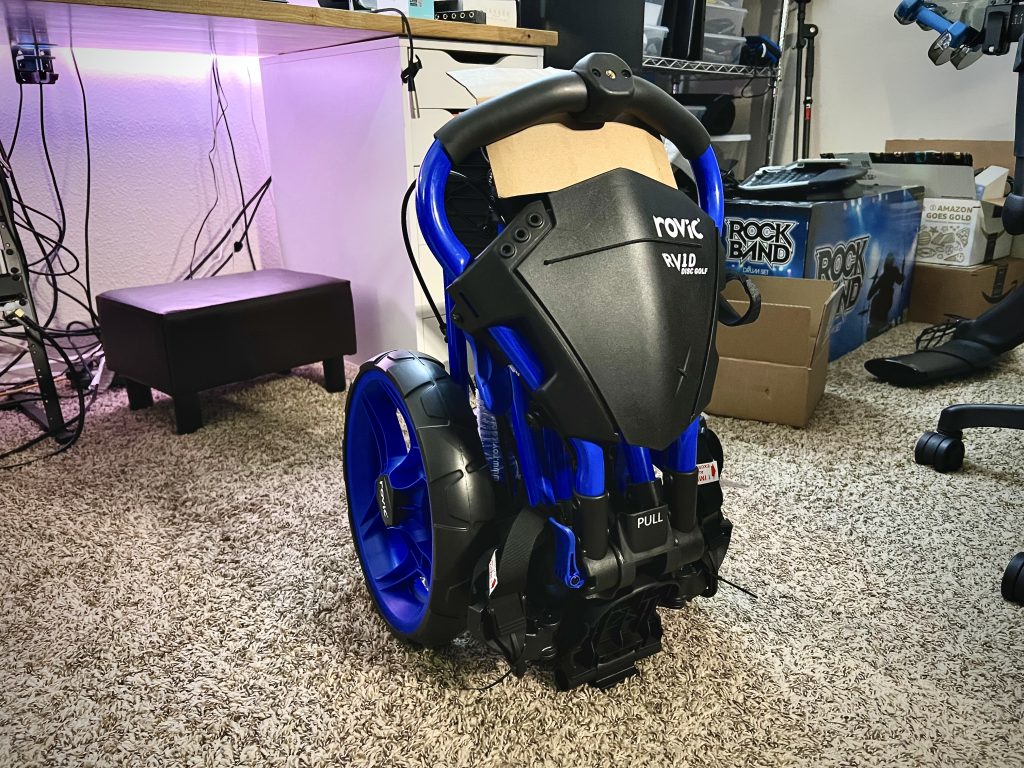
Thankfully, the setup of the RV1D is a pain-free experience. There’s really no assembly required as it’s collapsed down to its folded state in its packaging. Just lift it out of the box and pull it out of the plastic bag.
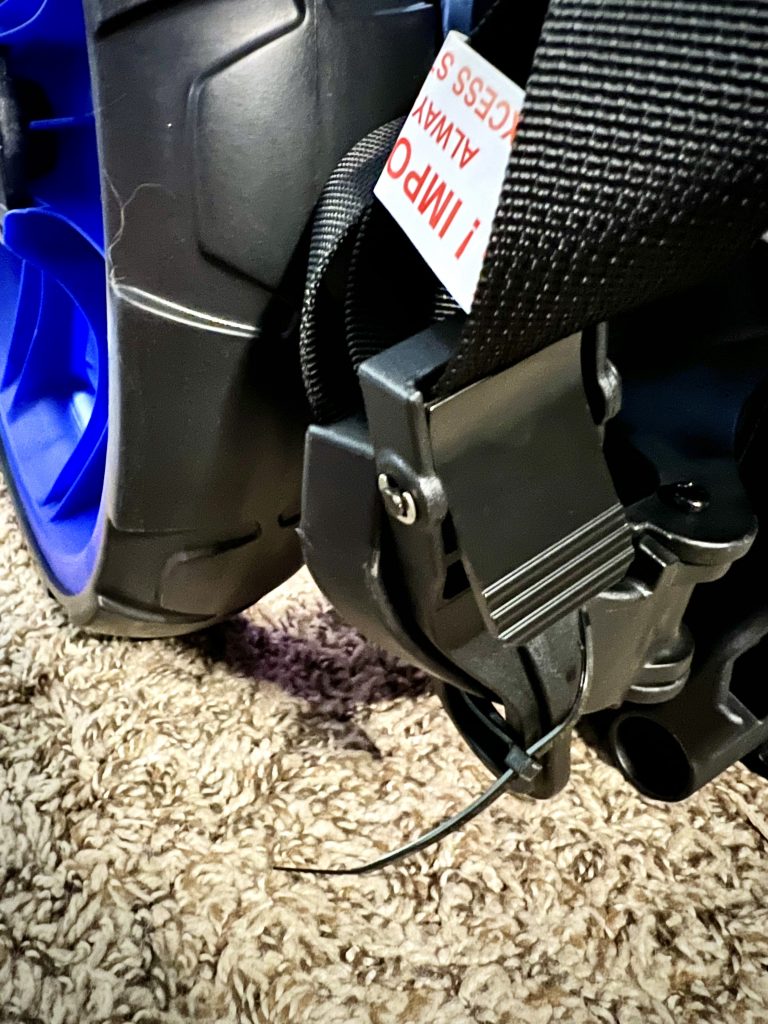
You’ll find a few zip-ties keeping everything secure and some plastic wrap, but beyond that, it’s ready to go with minimal effort. Cut the zip-ties and remove the plastic wrap as you go.
Setting up the RV1D
As there really isn’t any assembly required after unboxing, you’re ready to get started and unfold the disc golf cart.
Your initial setup of the RV1D will be basically the same steps you take when setting up the cart before a round, so you’ll be pretty proficient with this soon enough.
Step 1: Fold out the front wheel
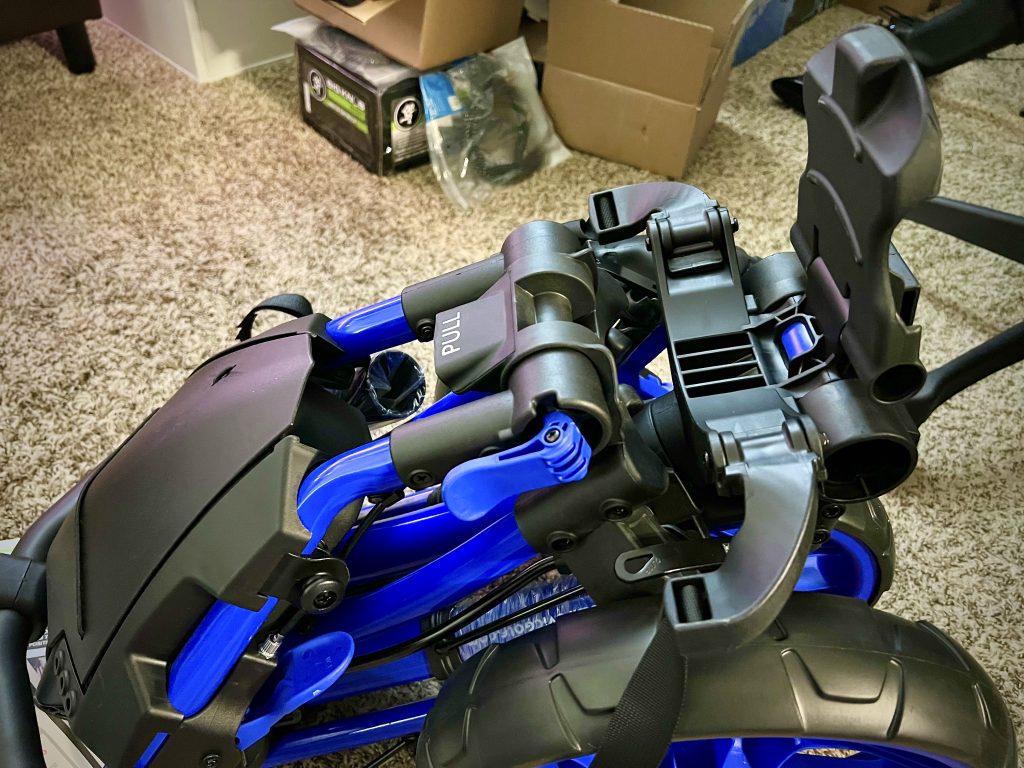
Lay the RV1D on the ground so that the wheels are on the ground with the handle and storage compartment as well. Flip the plastic wheel guard up to reveal the button underneath. Push in this button, grab the wheel and pull upward until it locks.
Step 2: Expand the cart frame
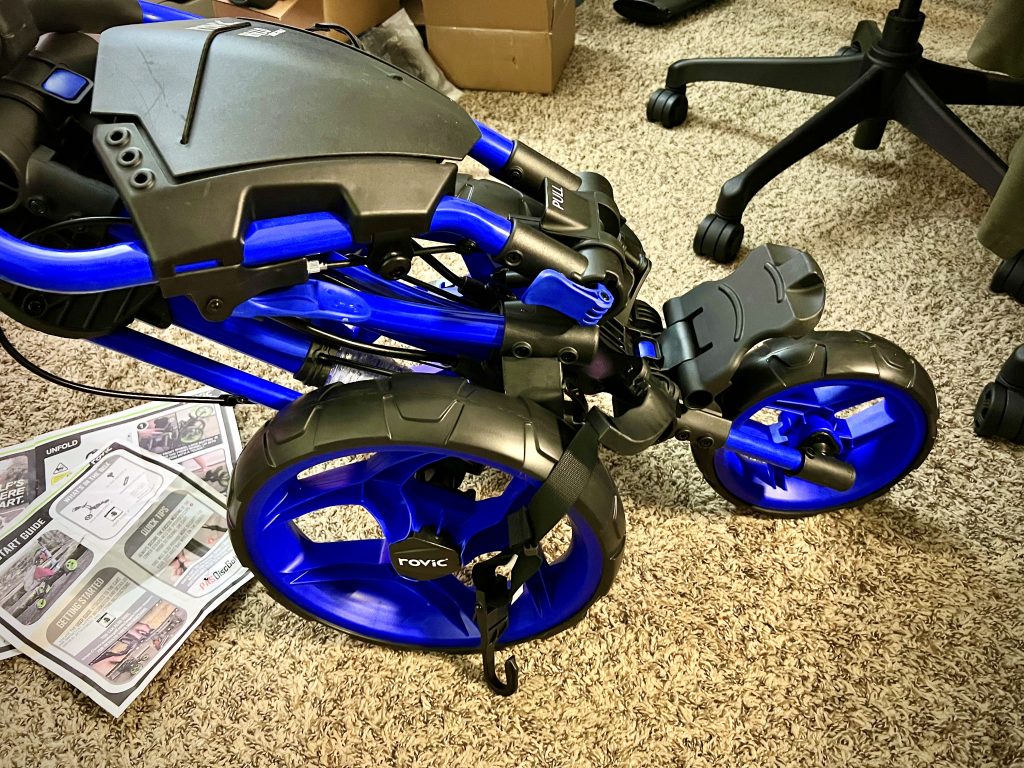
Once the front wheel is folded out, the rest of the cart can be opened. Grab the plastic handle labeled “PULL” with one hand and the front wheel with the other, lifting up on the “PULL” handle. It’s more of a “pulling away” motion to separate the parts.
This will lift the upper main frame up and expand the rear wheel arms. You’ll probably need to actually lift it up off the ground a bit, as they expand out horizontally.
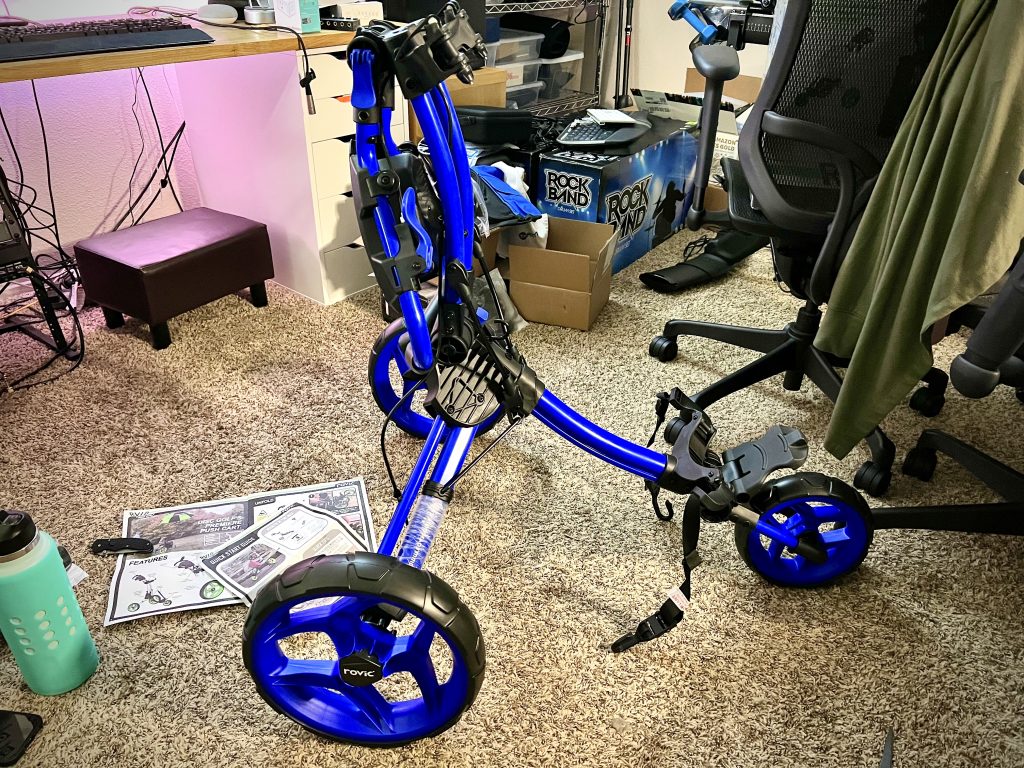
There will be a release button that clicks into the locked position when expanded fully letting you know it’s ready to go. You’ll need to press this button to collapse the cart when you’re done with it.
The “PULL” handle should now be the top-most part of the frame and all three wheels should be fully extended.
Step 3: Raise the handlebar
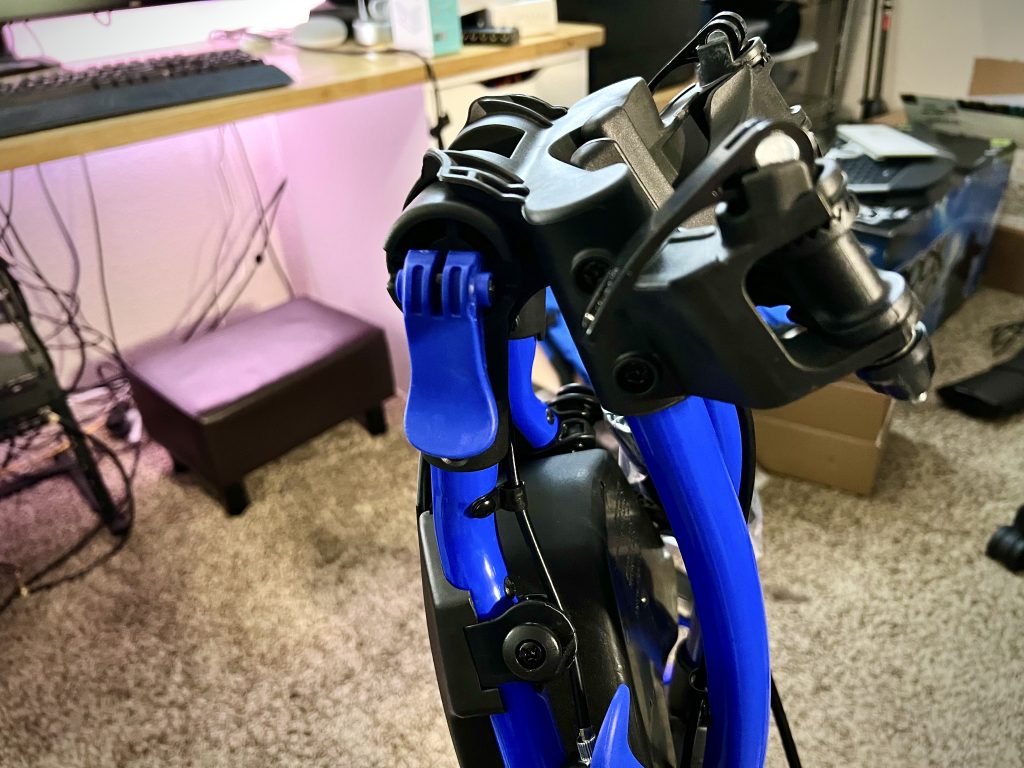
Near the “PULL” handle you’ll see a plastic locking lever that keeps the handlebar in place. Flip this up and you can lift the handle up into place. Flip this back down to secure the handlebar.
Step 4: Unfold the bag hooks and hang your bag
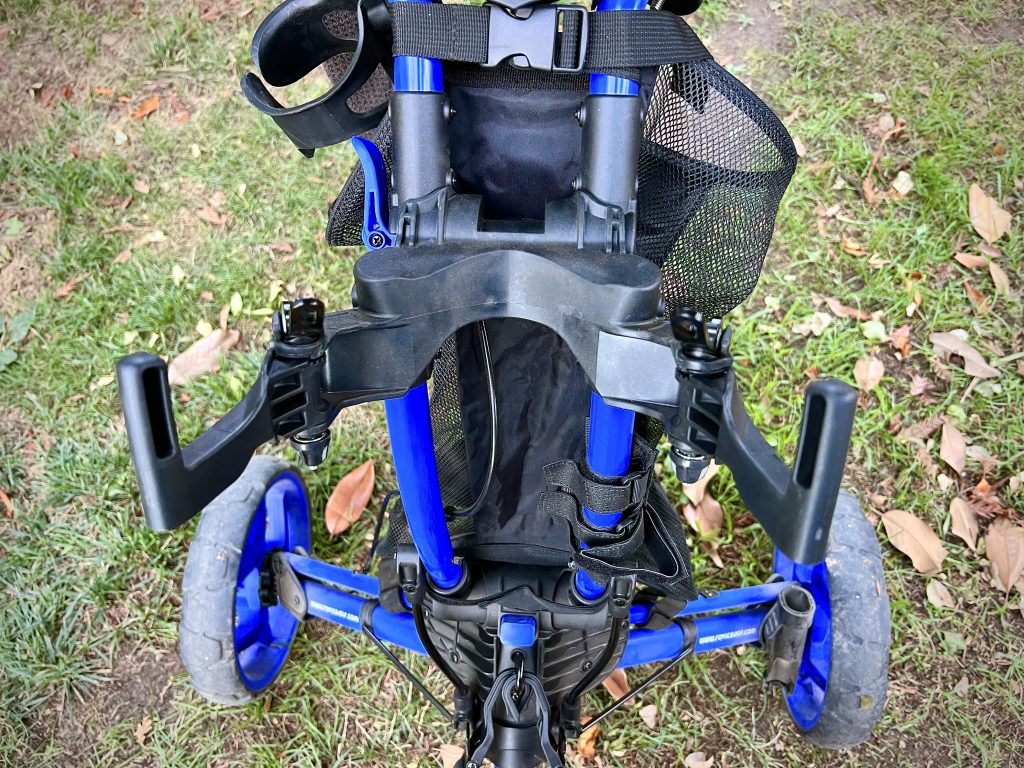
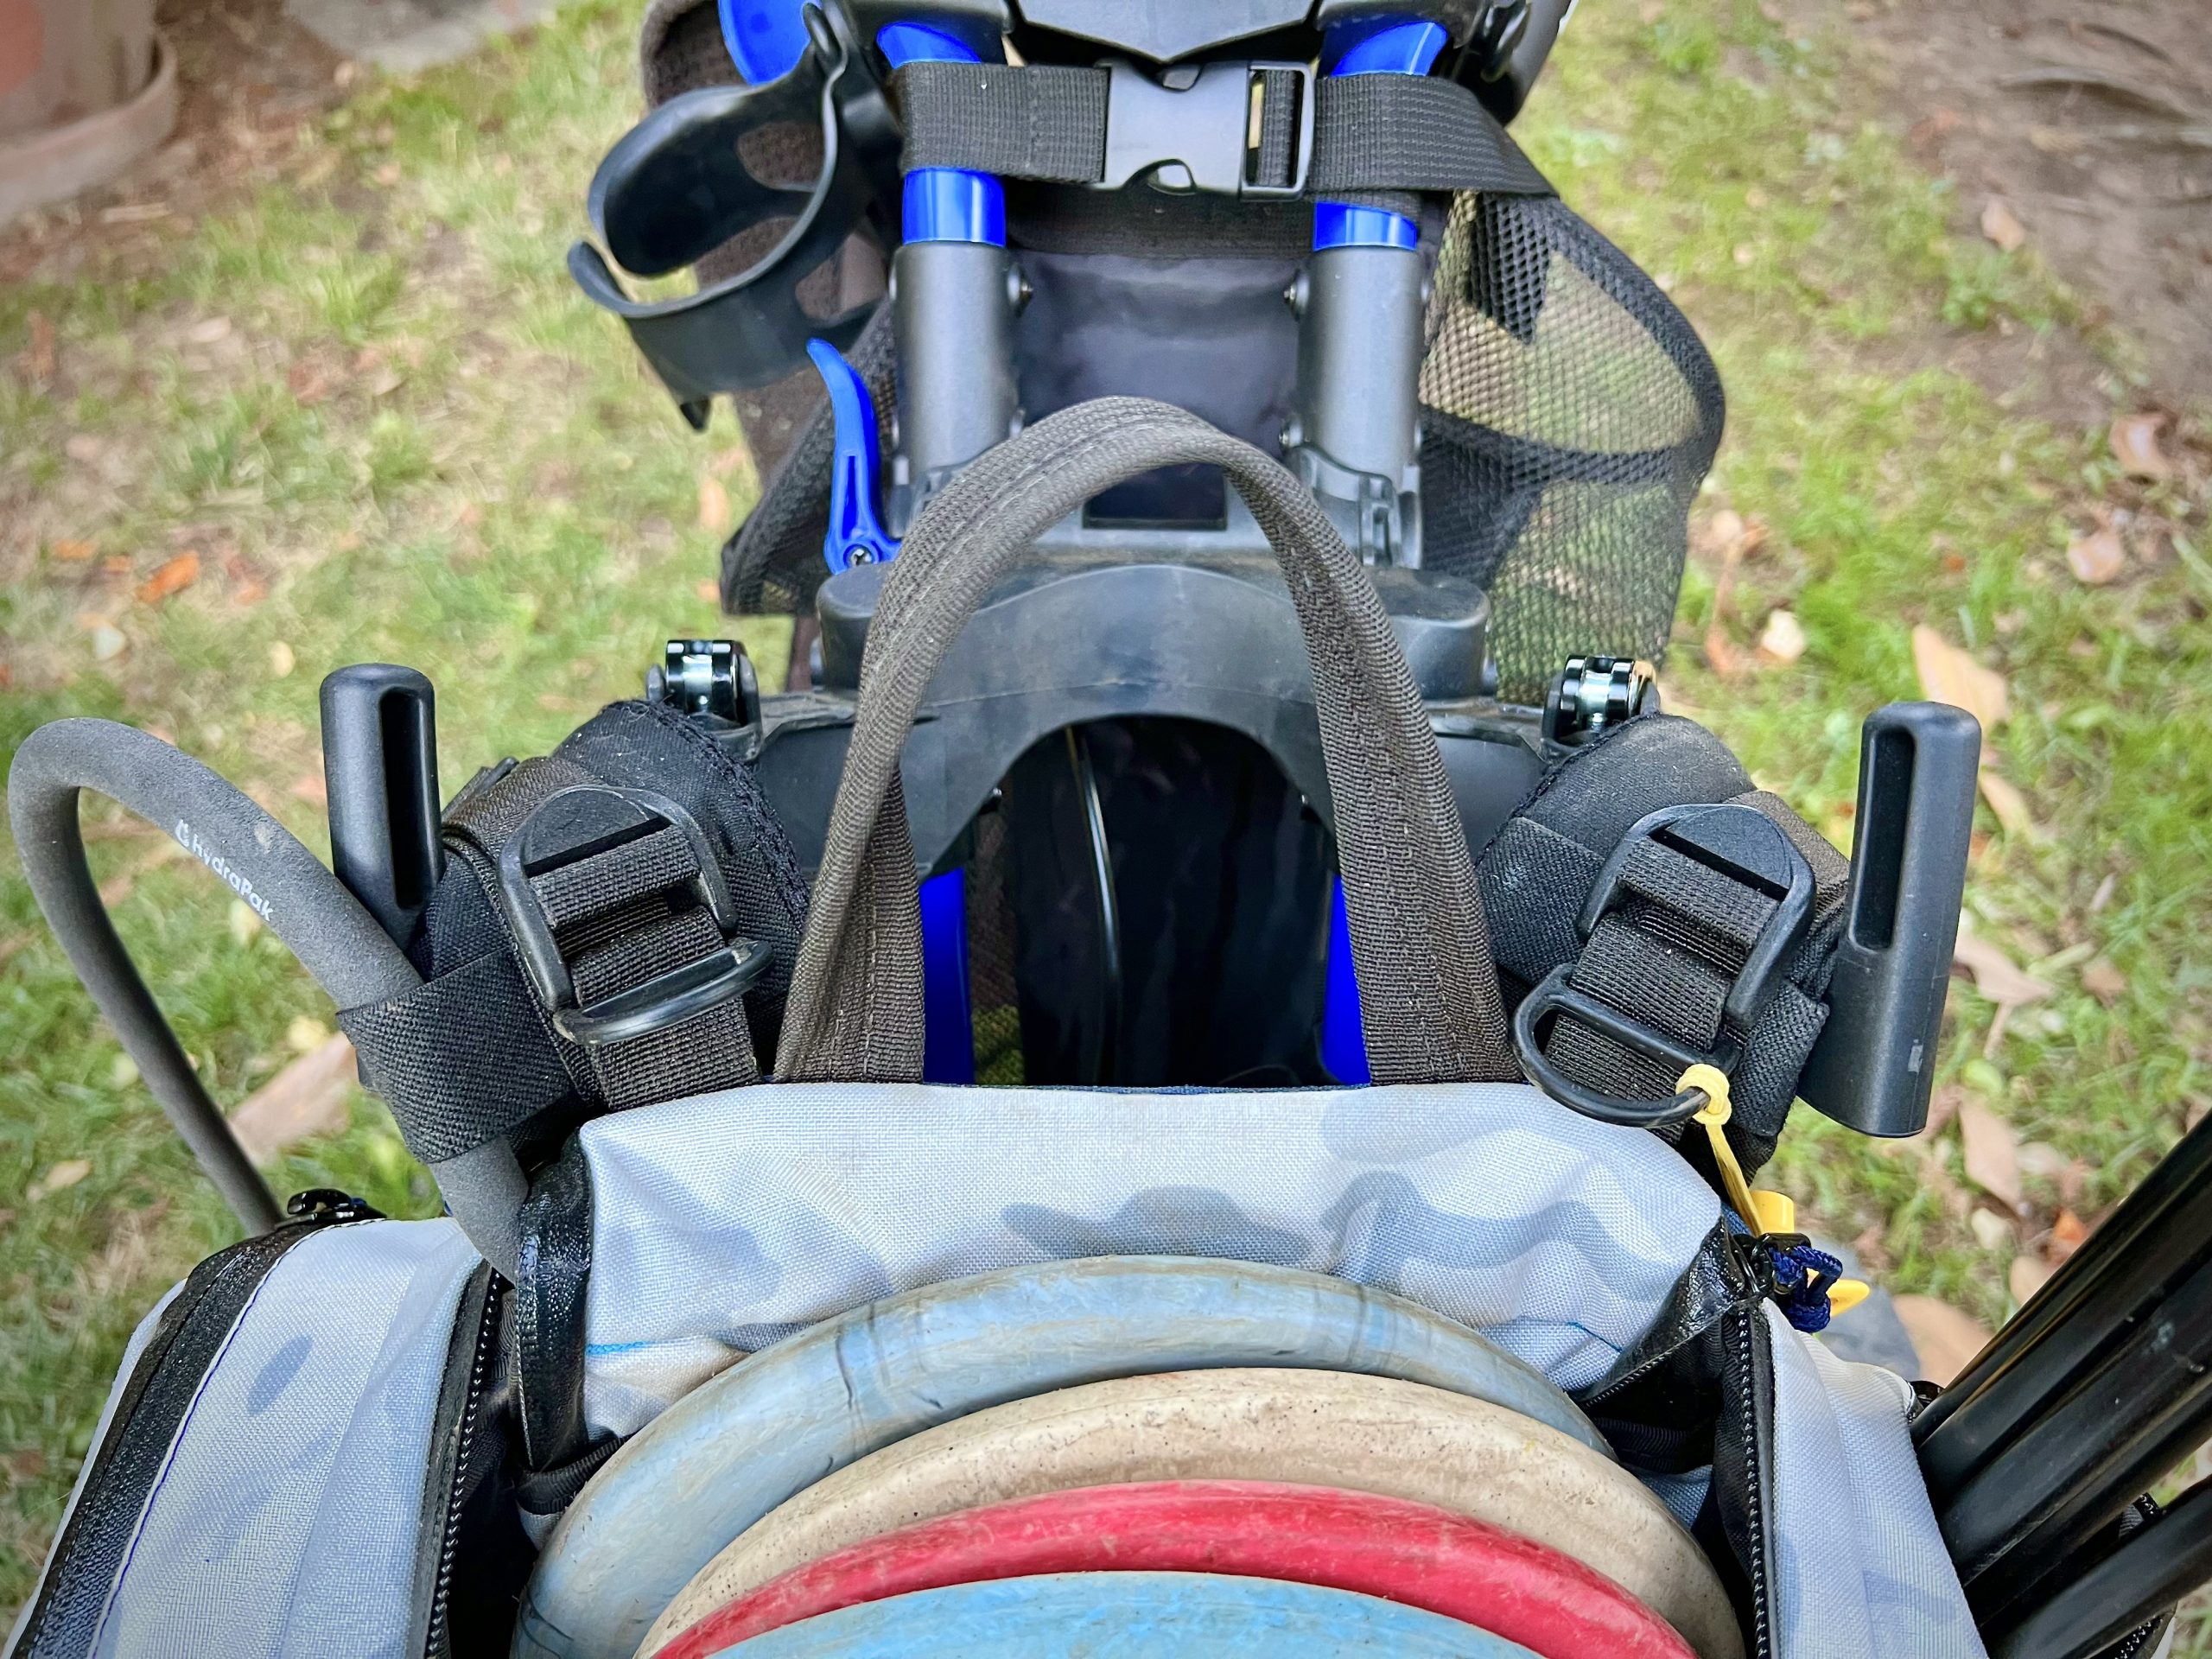
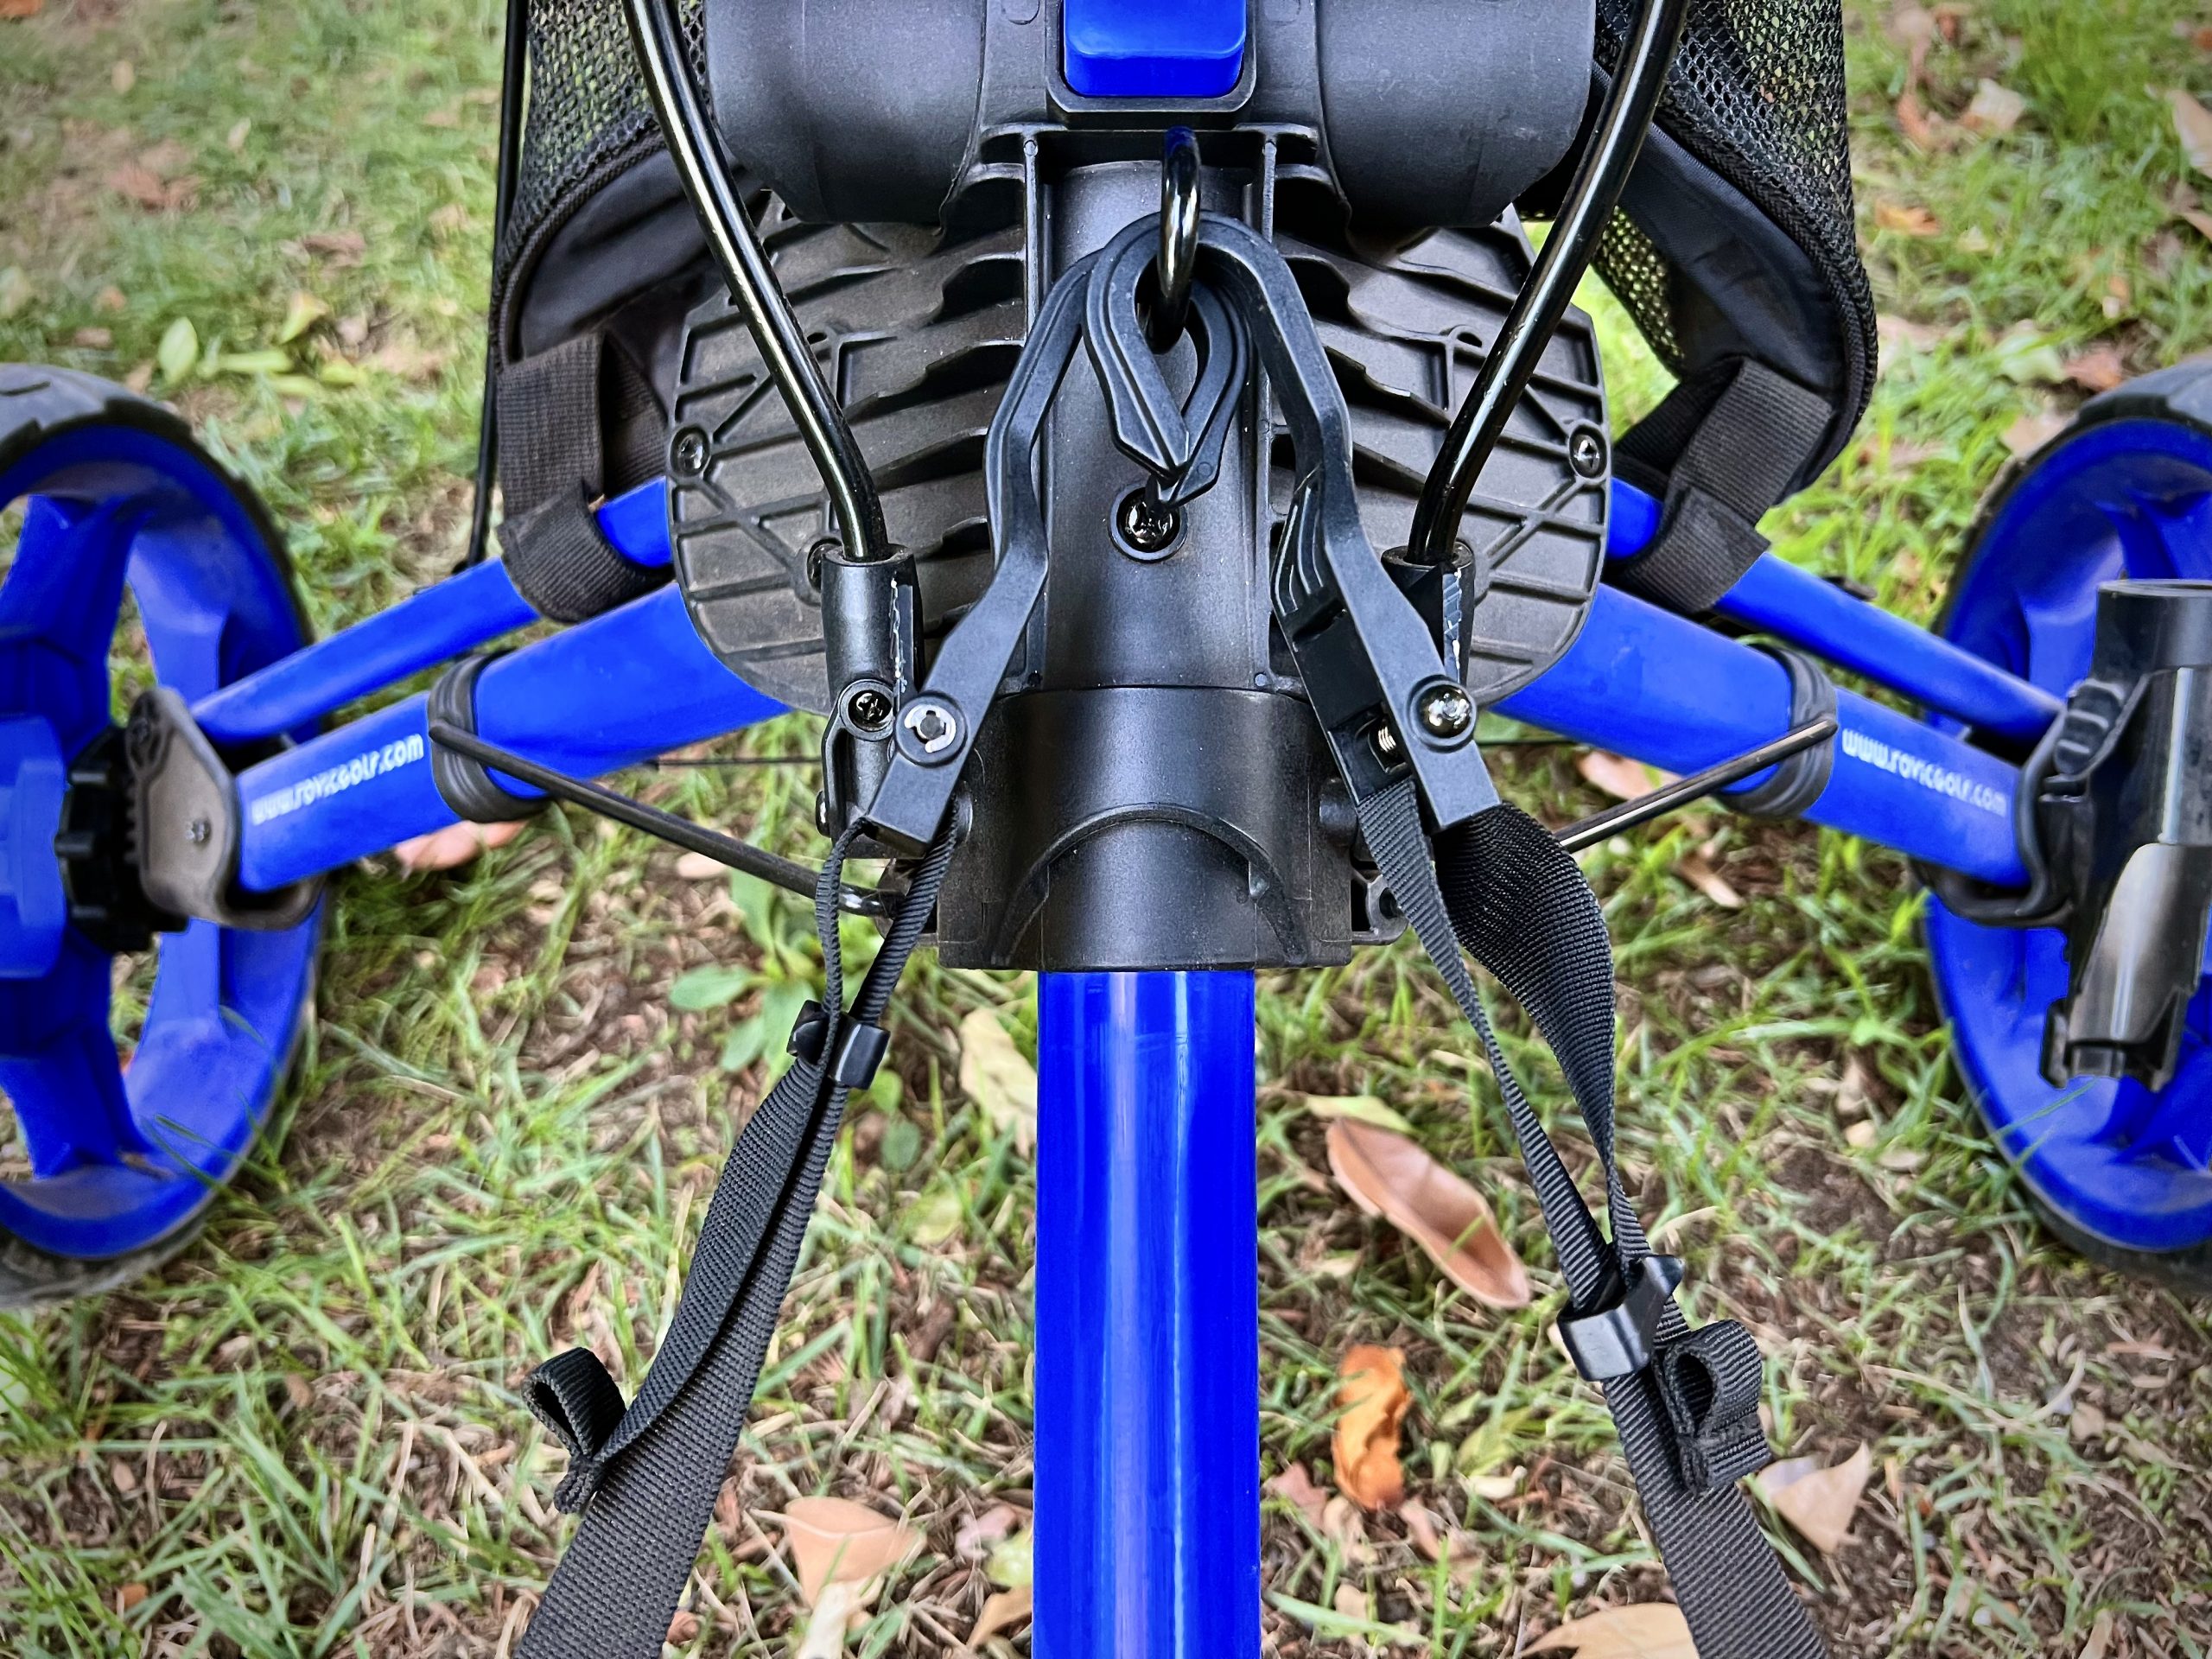
Each of the bag hooks has its own metal locking lever to keep them in place. The hooks are positionable with a stepped mechanism so they’ll stay where you put them while you hang your bag if you don’t lock them down first.
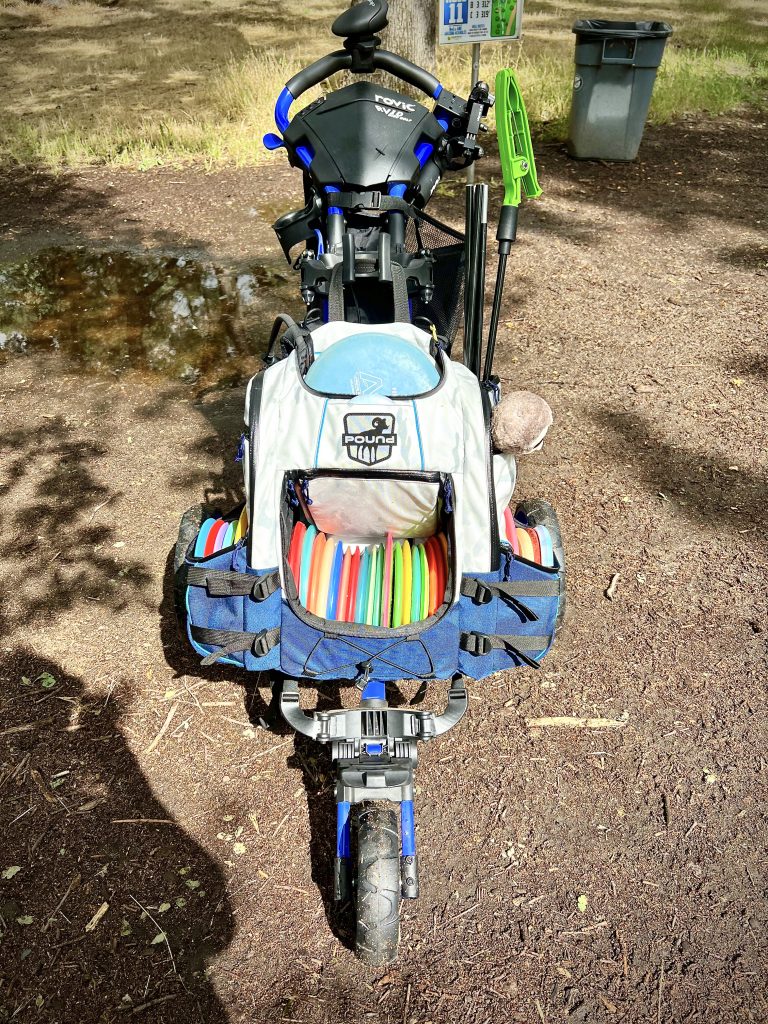
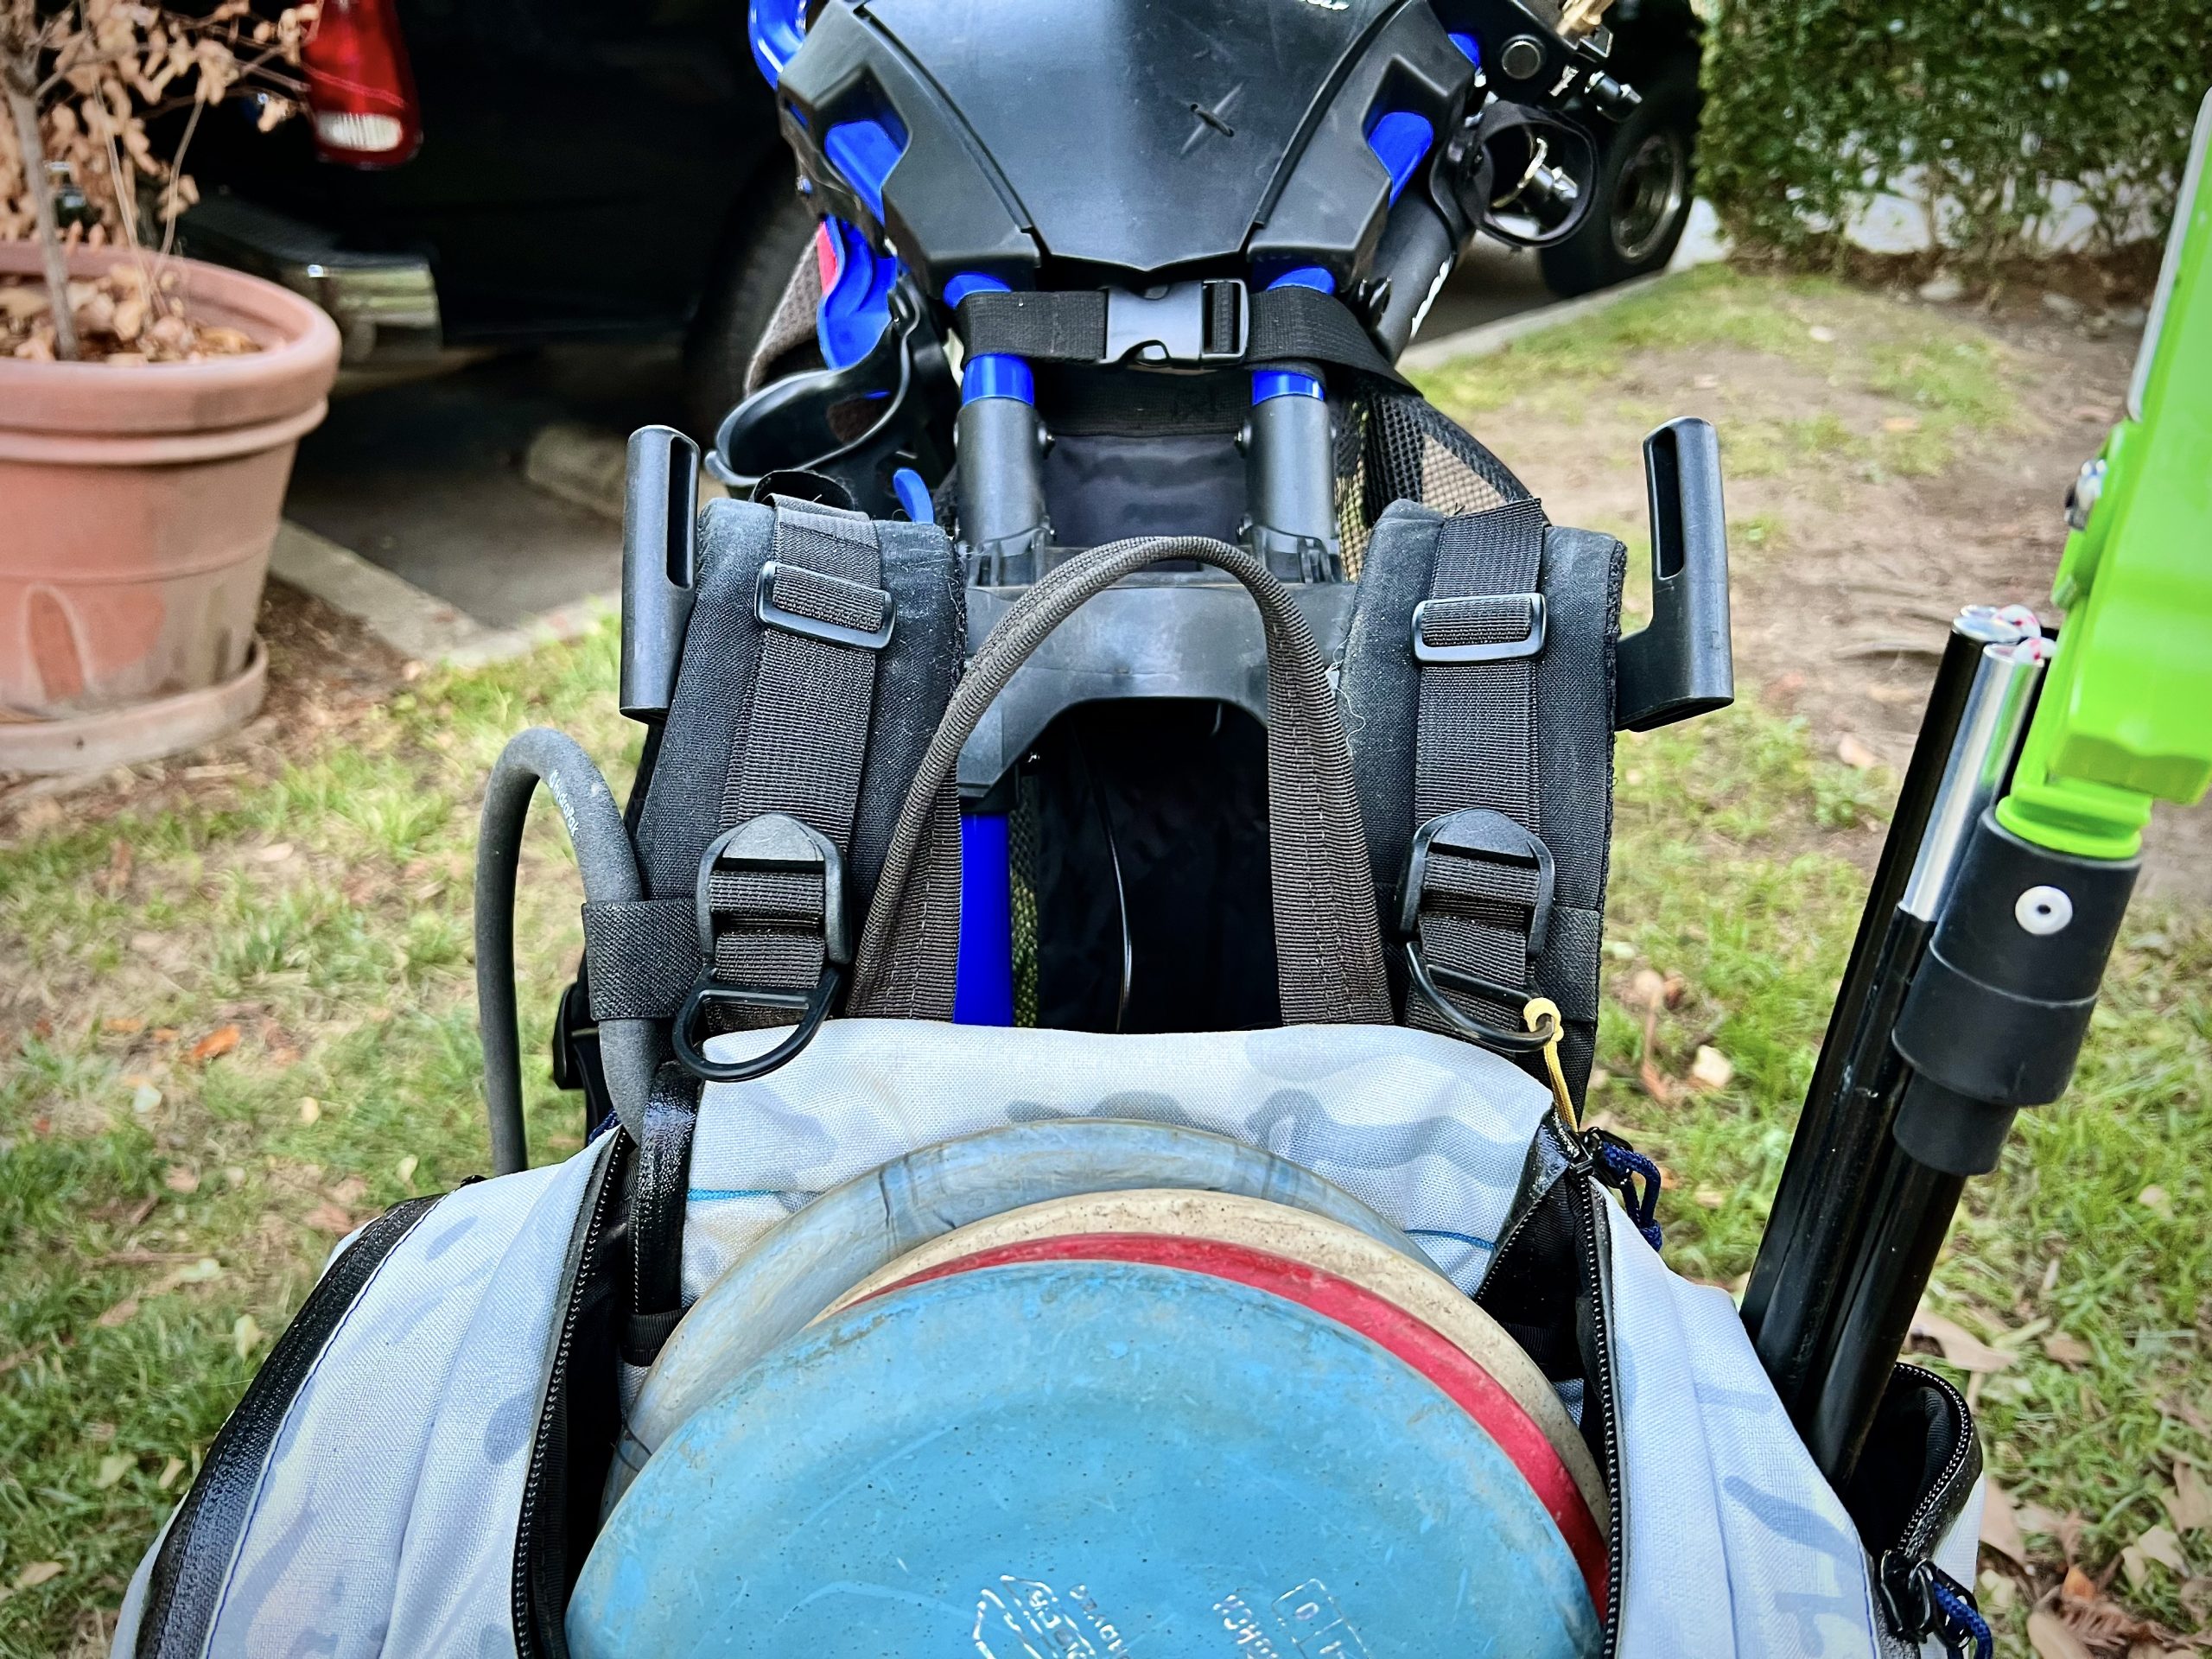
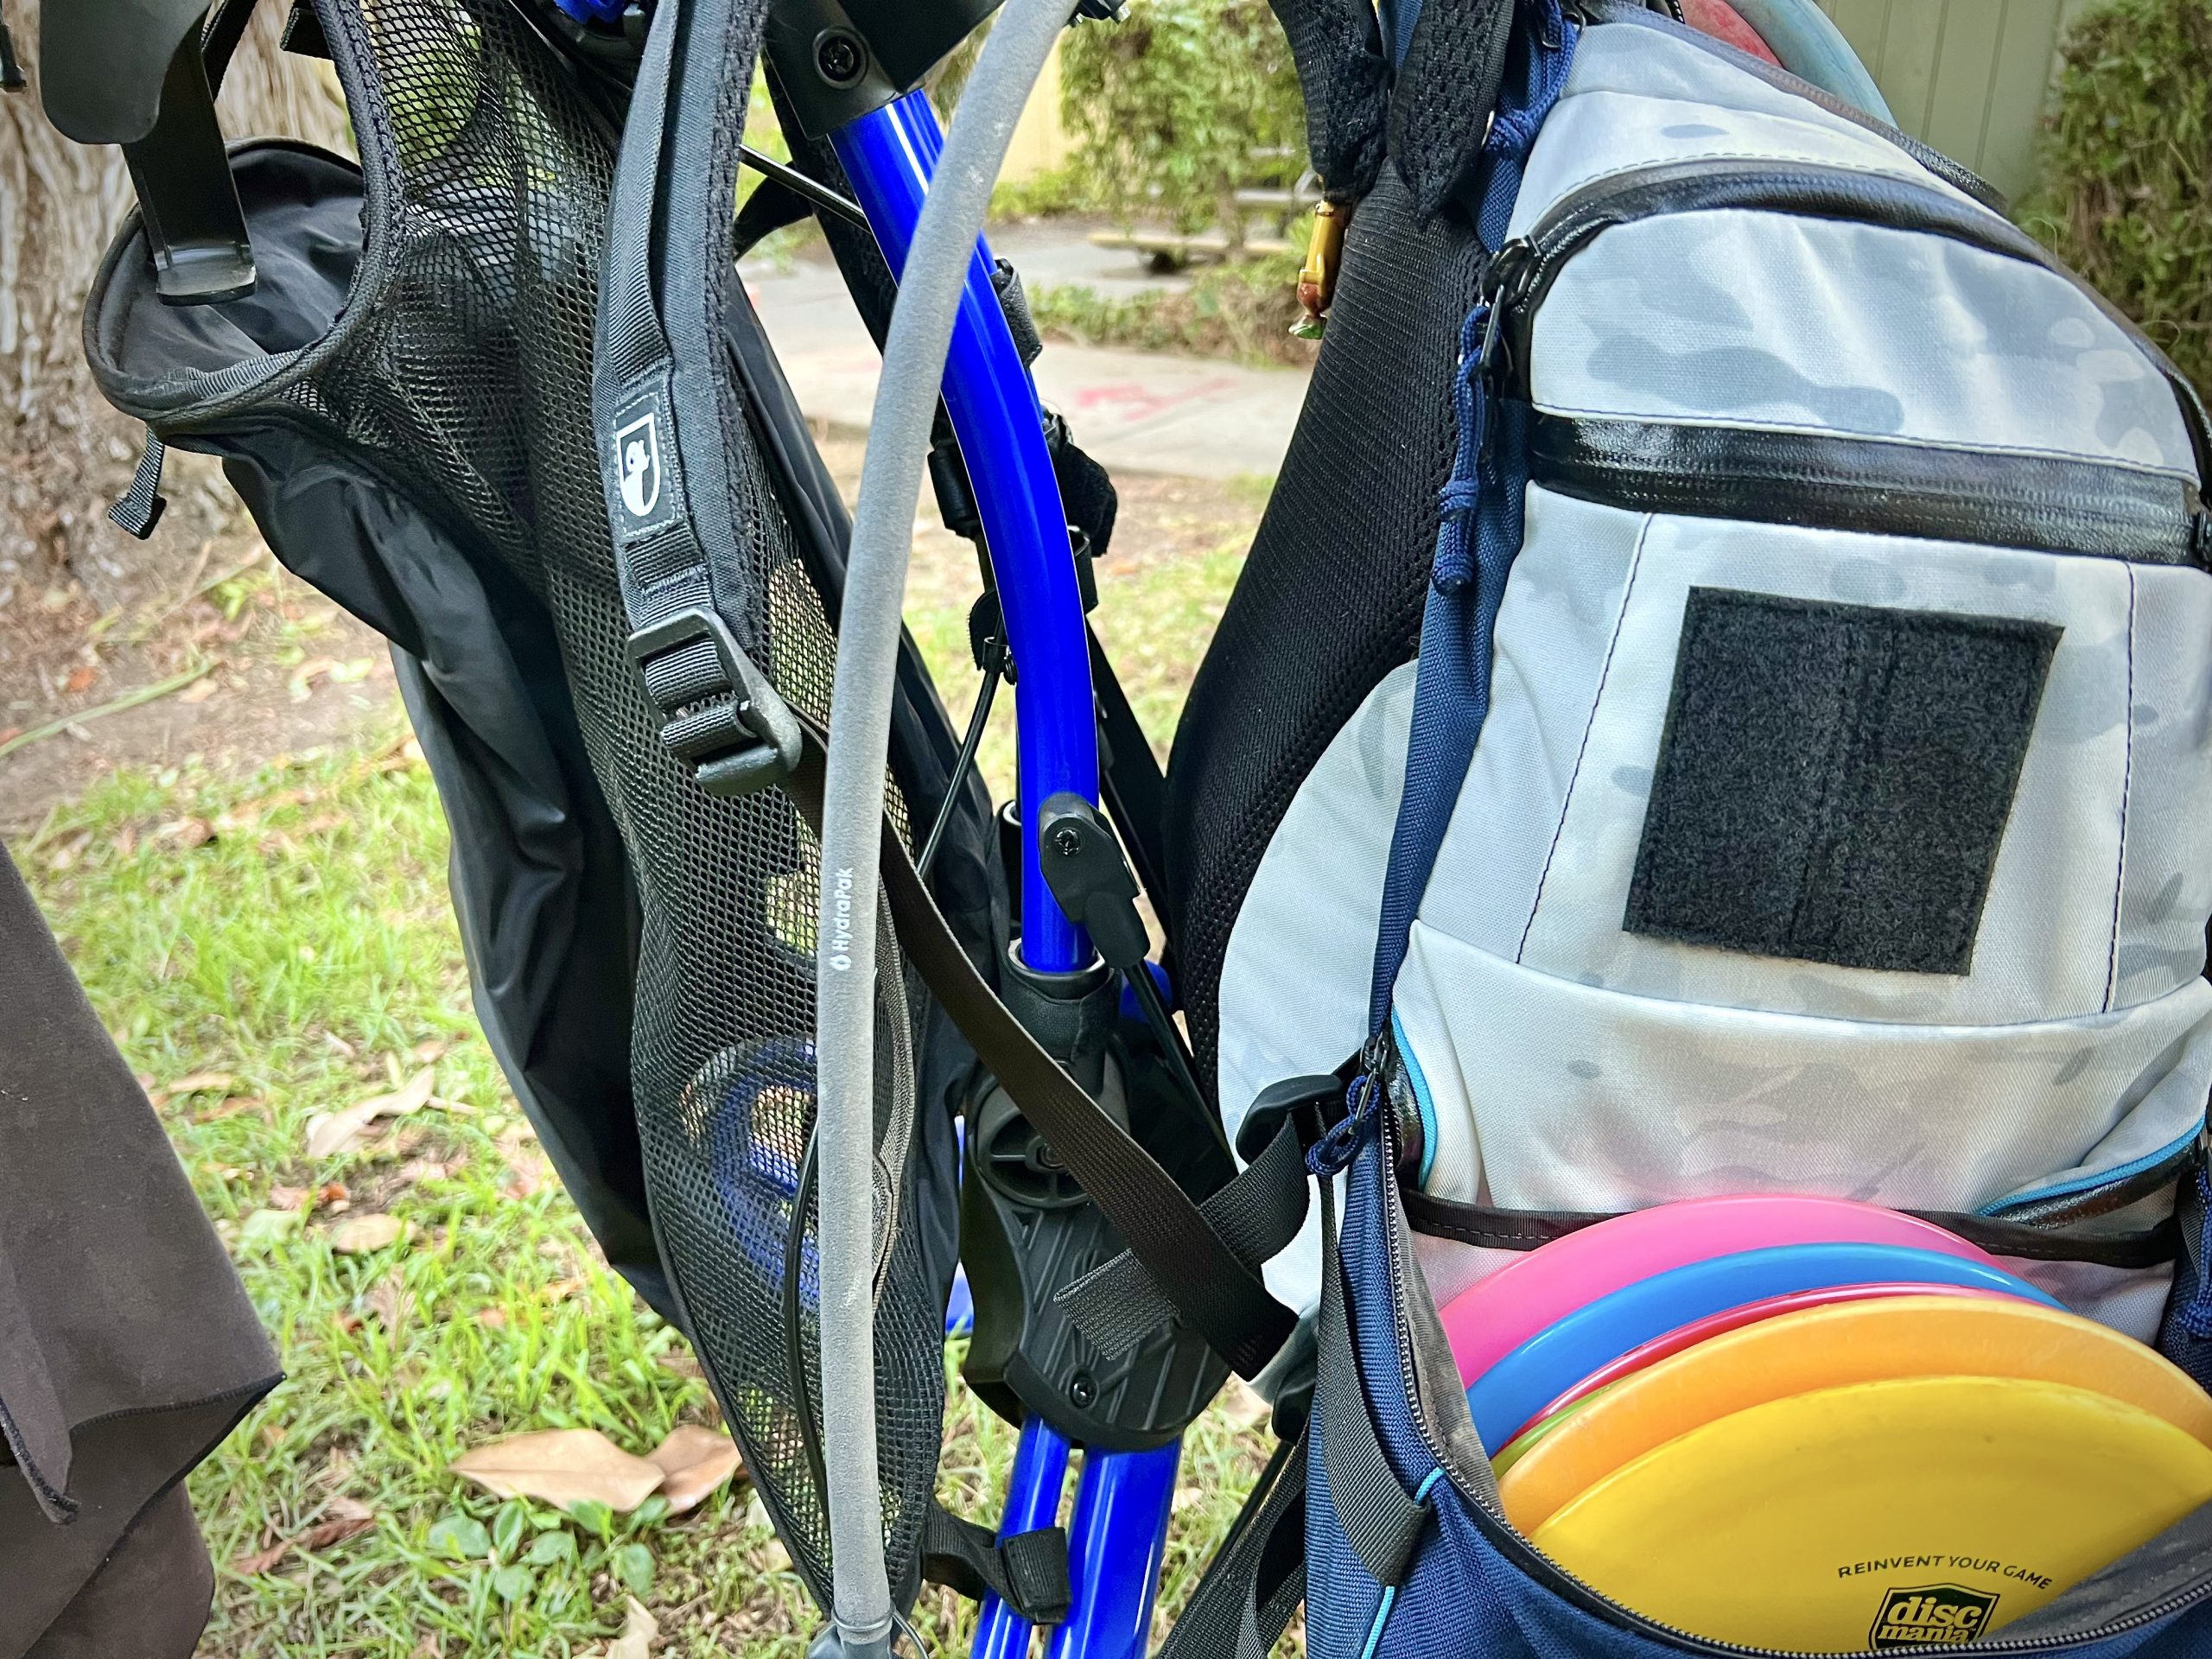
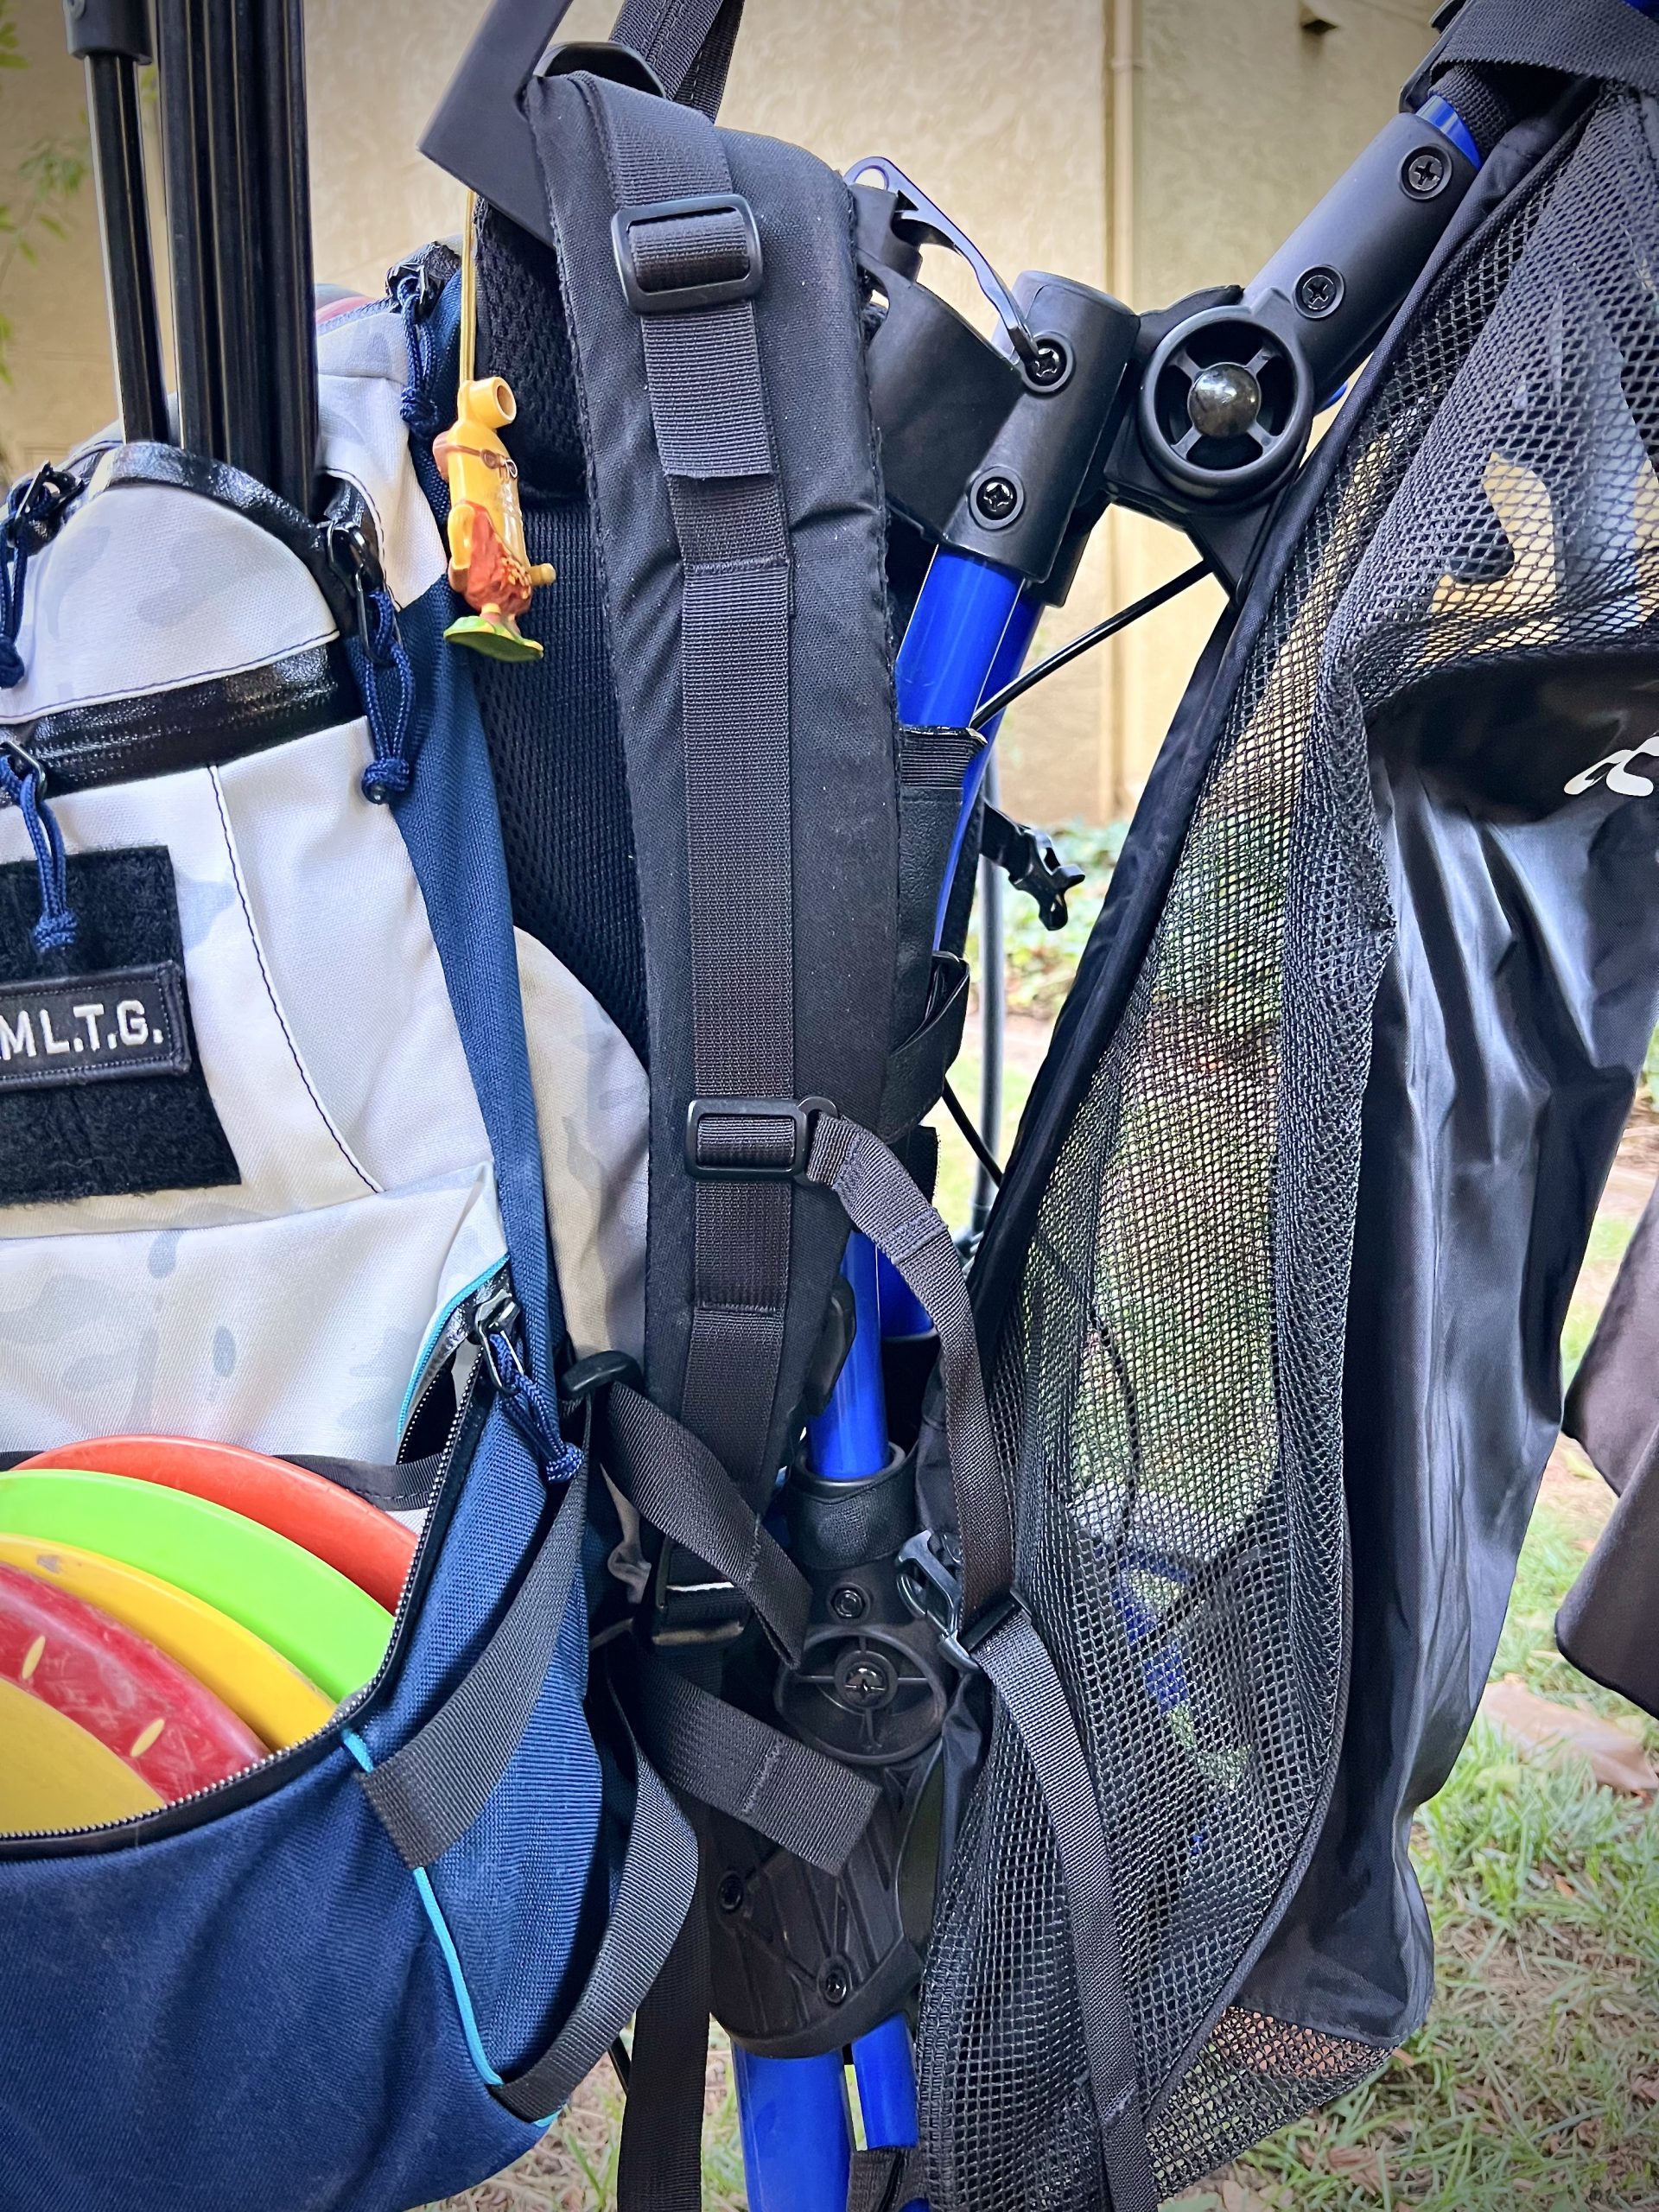
You can hang your bag with either the carry handle loop or the backpack straps. Depending on your backpack one may be easier than the other. We would advise hanging your bag from the backpack straps if possible, as this will be more secure and cause less stress on your bag.
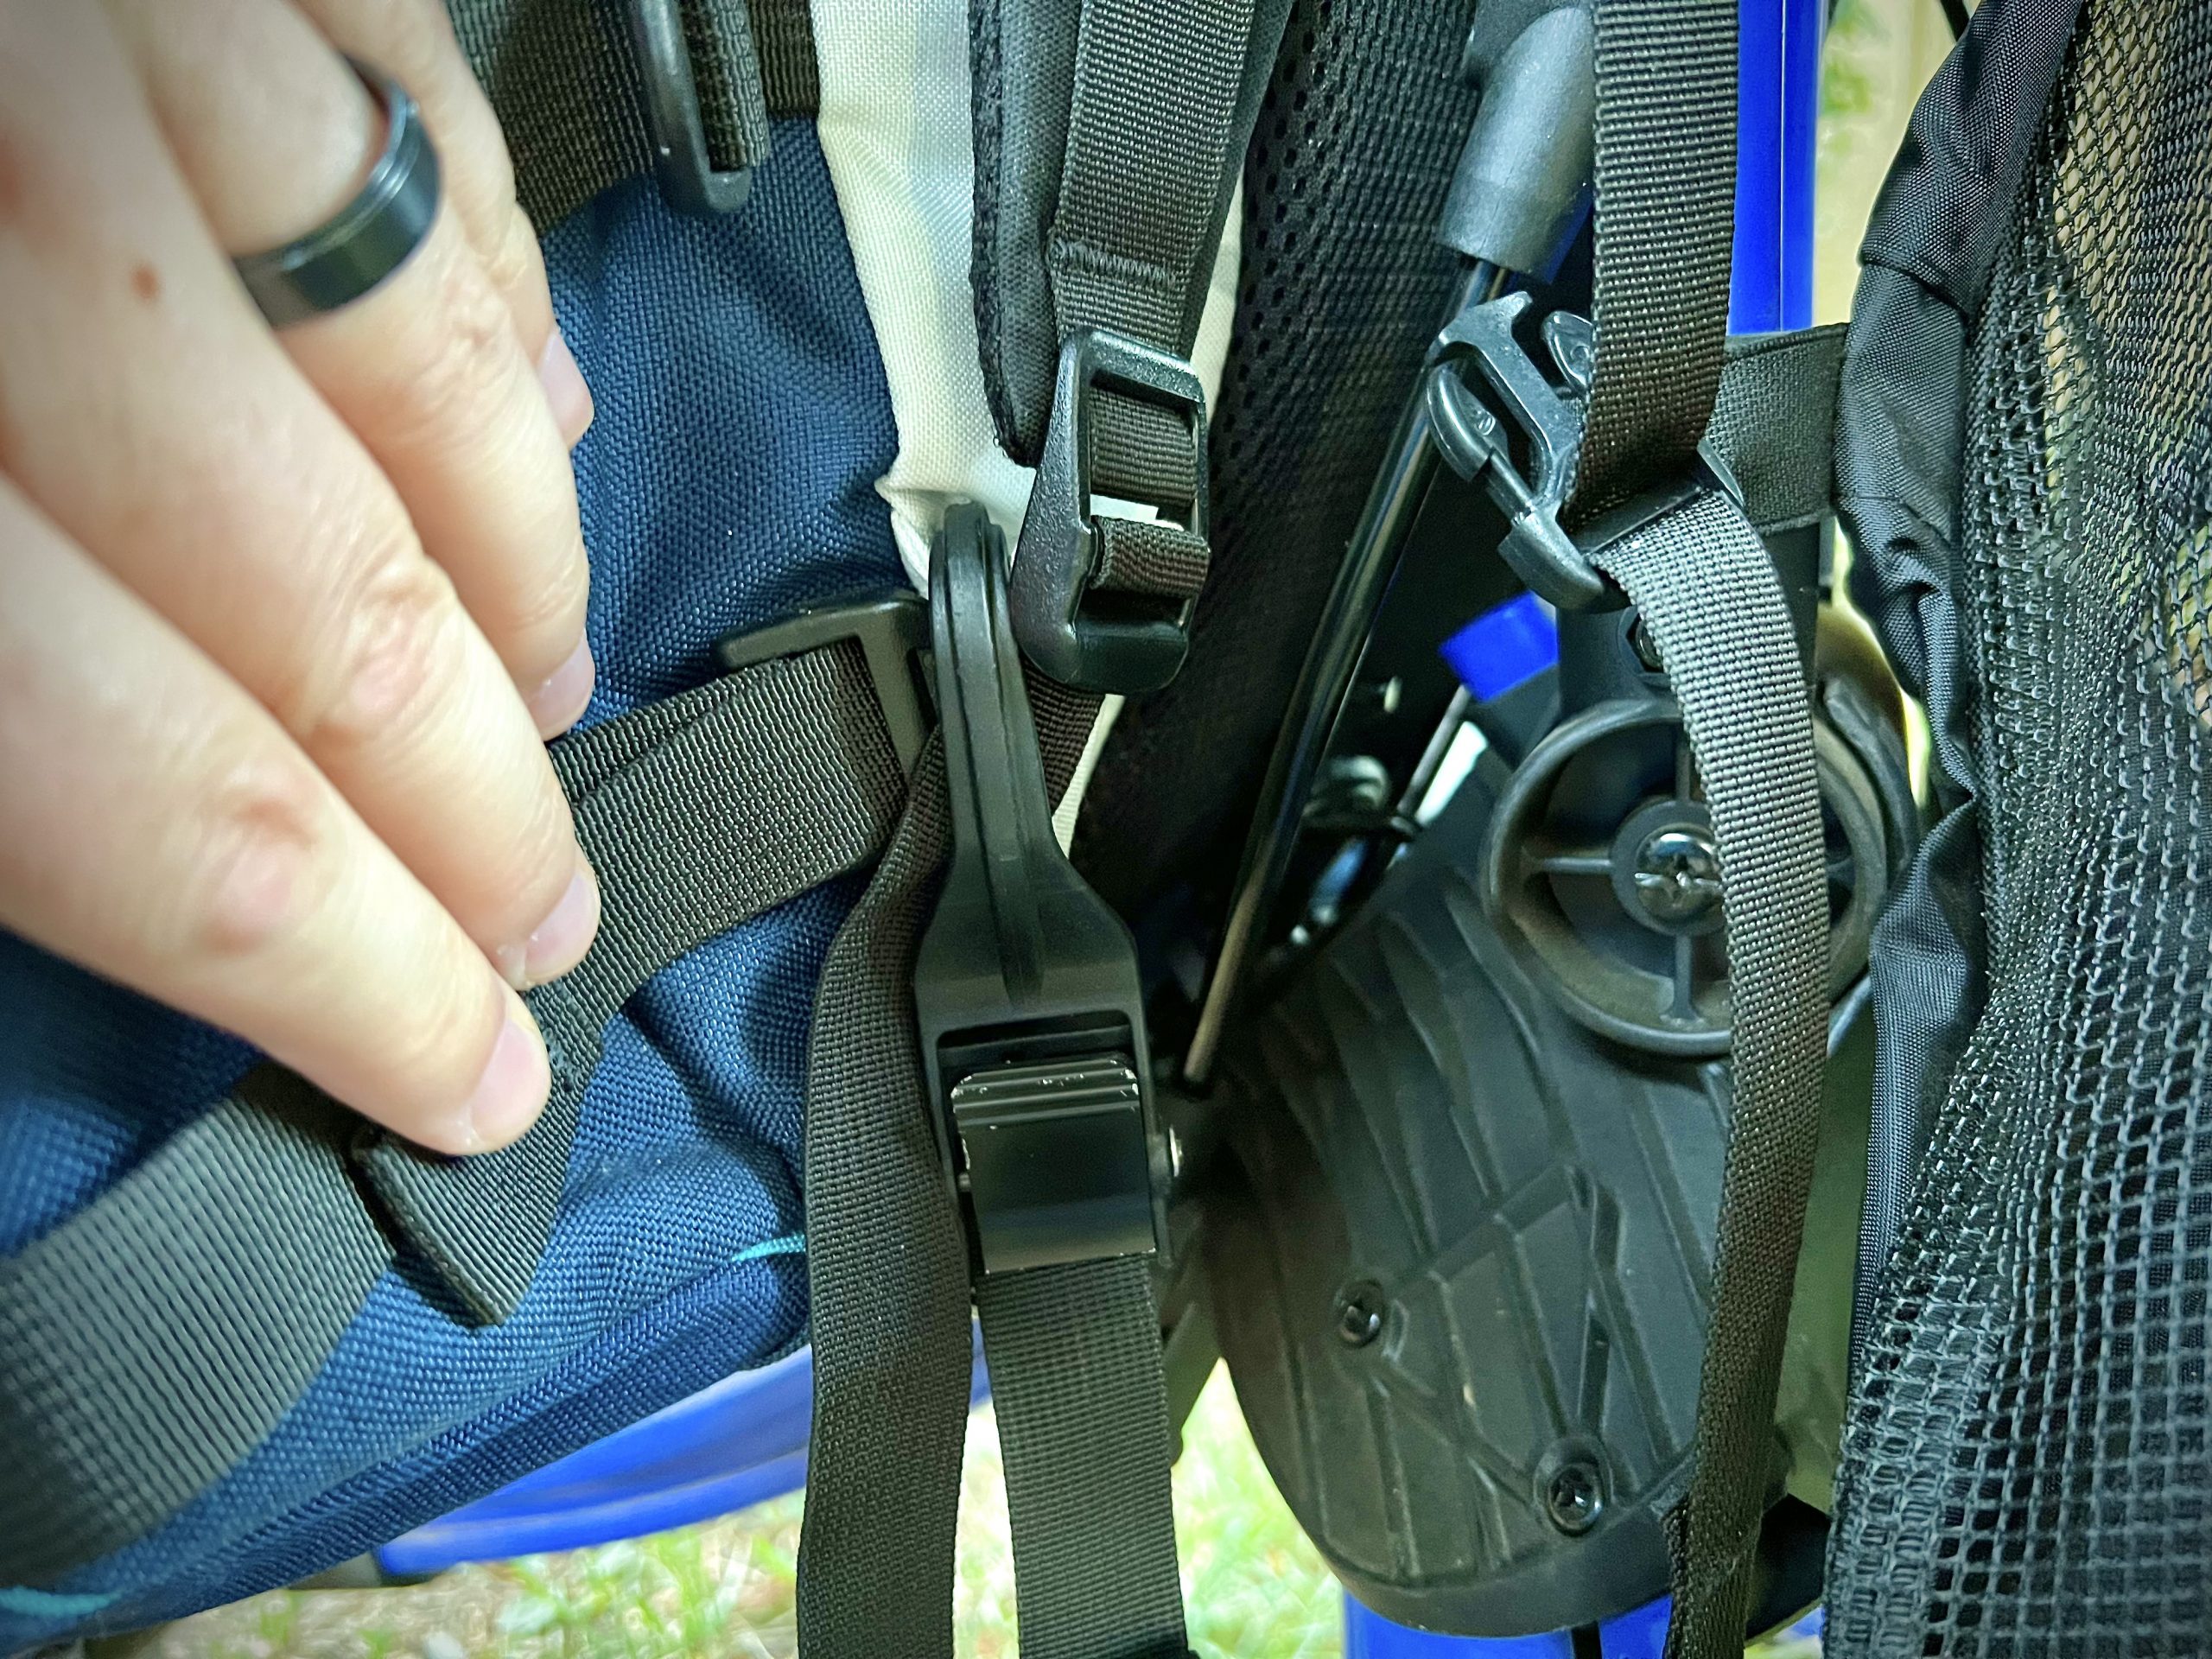
From here, you’ll want to tighten your backpack straps as small as they can go, all the way to the base where they anchor to the bag itself. This will ensure that the backpack is anchored in securely and doesn’t have any wiggle room after the next step.
Step 5: Secure your bag to the cart
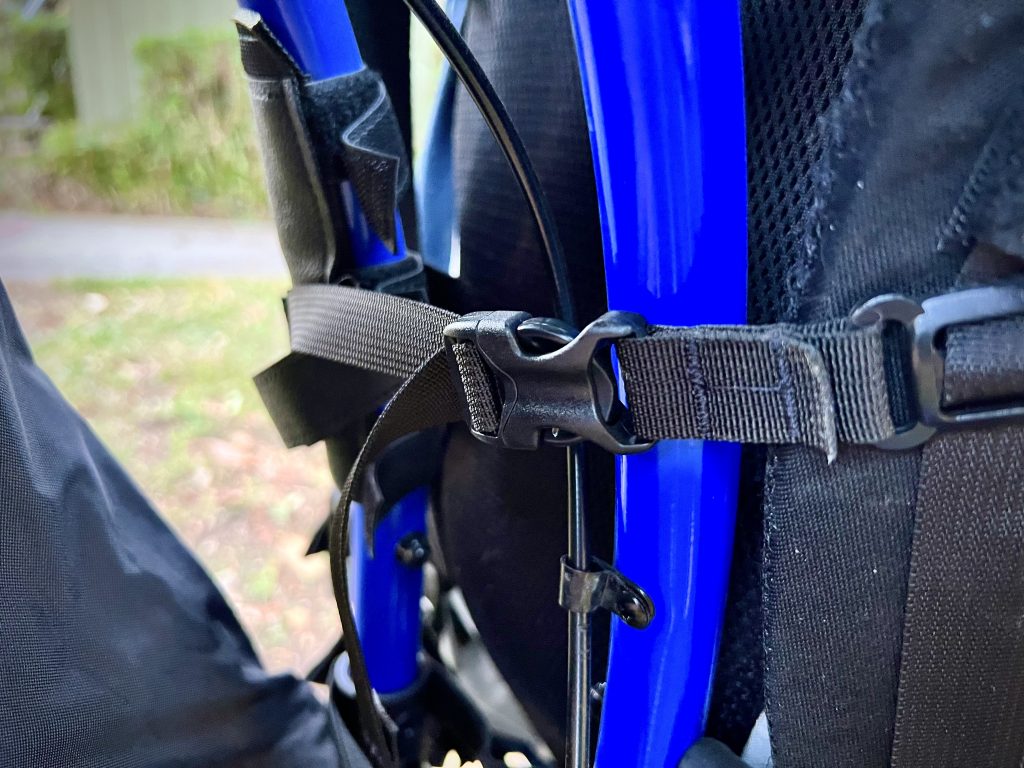
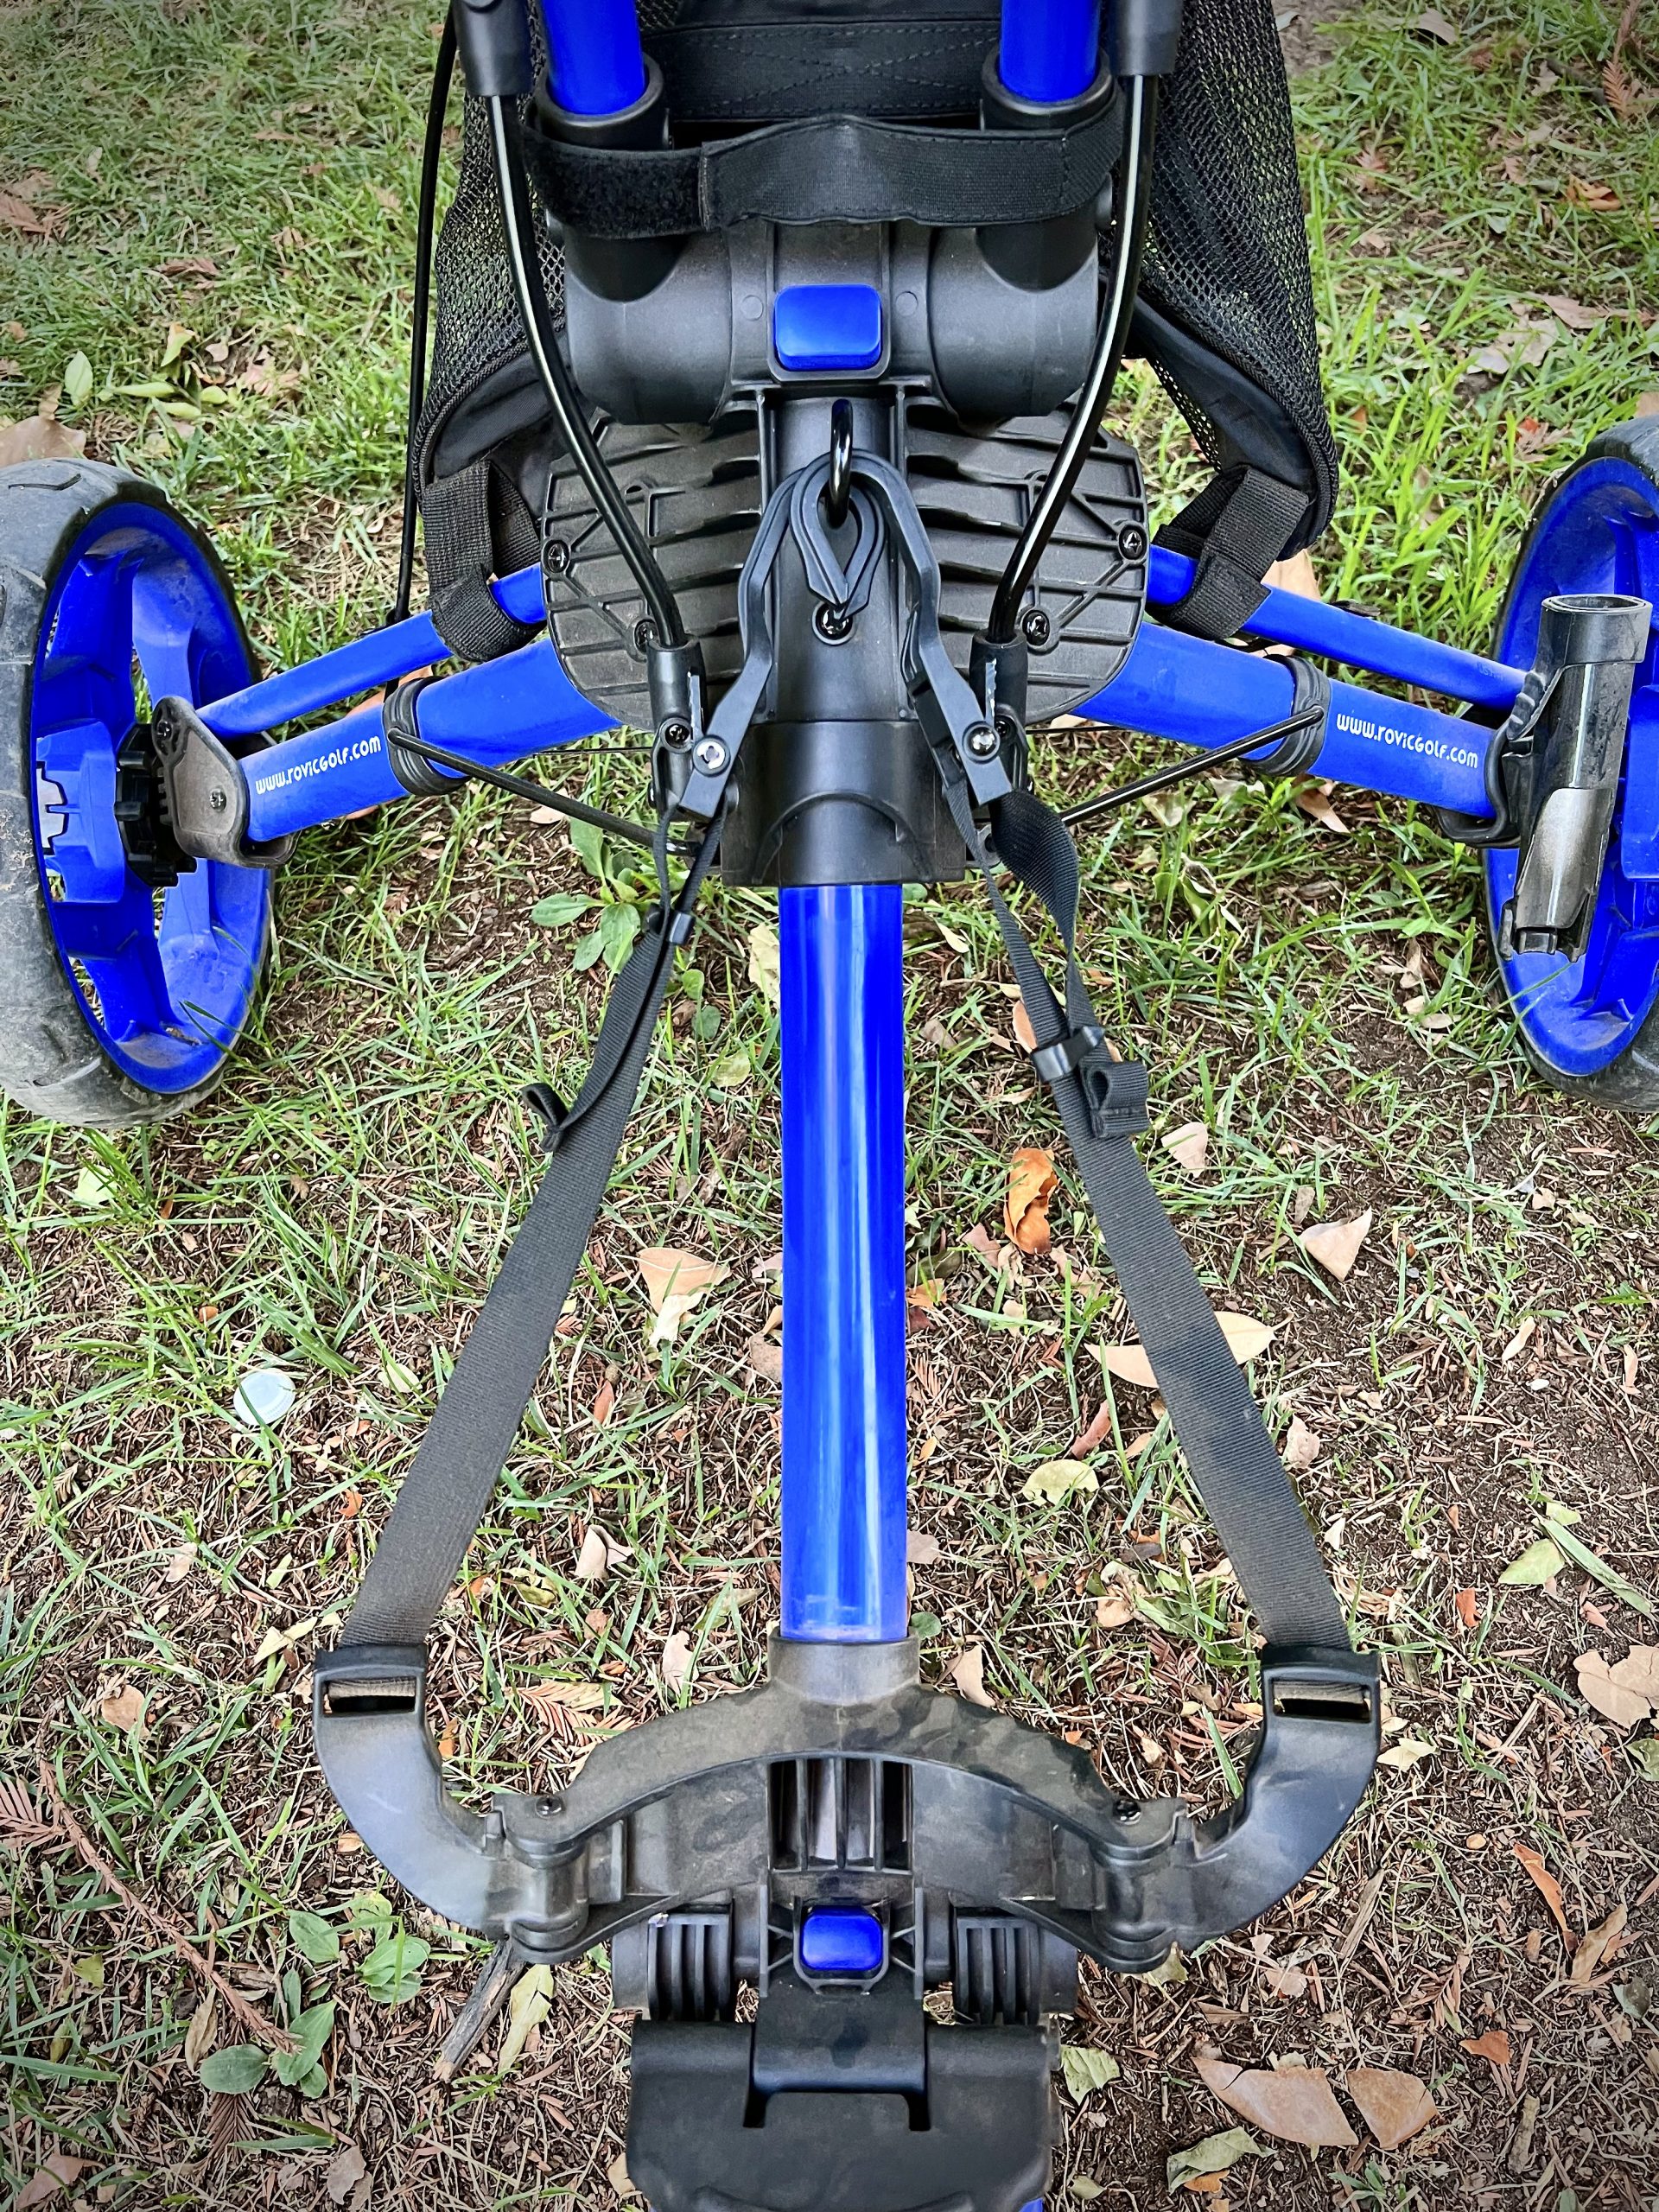
If your backpack has a sternum strap, you can connect this around the two vertical cart frame tubes. From there, you’ll want to use the two tether straps anchored to the rear wheel supports.
The best way to secure your bag is to take the hooks on the straps and hook those at the base of the backpack strap that we tightened in the step above. Once hooked in, tighten the straps as much as you can reasonably do without putting undue force on the straps and your backpack.
Your bag should now be secured and you’re ready to get your round going.
Removing your bag and stowing the RV1D
When you’re done with your round and it’s time to put everything back in your car, unstrapping and removing your bag is as easy as reversing the steps listed above:
- Loosen the anchor straps and remove them from the bag straps
- Disconnect the sternum strap if you have one
- Loosen your backpack straps back to the wearable position (optional, but I do this to easily bring my bag back inside from my car)
- Lift the bag from the hooks and remove them from the cart
- Unlock the hooks and put them back into the storage position and relock them
- Holding the handlebar, unlock the handlebar lever, collapse the handlebar and relock
- Collapse the main frame into its storage position by pushing the center release button, pulling on the “PULL” handle and front wheel assembly to squeeze it into that state
- Press the button on the wheel lock to collapse and fold back into place
Clicgear Rovic RV1D accessories
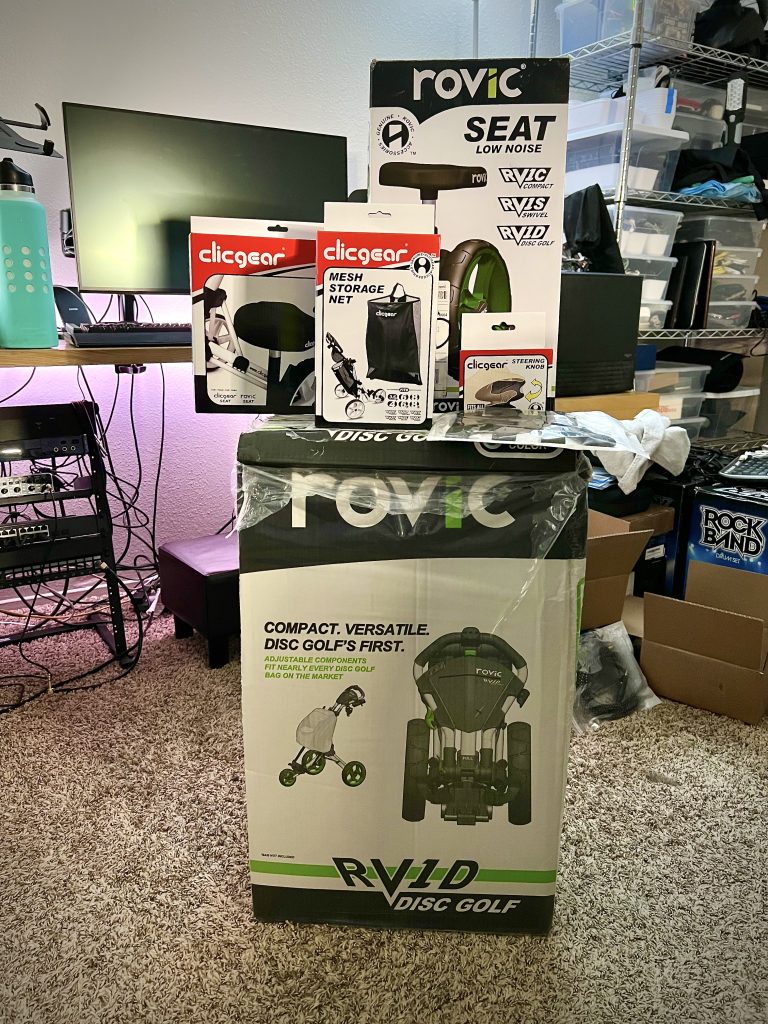
Just like with Zuca, there is a whole ecosystem of accessories for Clicgear Rovic carts. While some of the accessories work across all Clicgear and Rovic By Clicgear push carts, some are very specific to Rovic-only and Rovic RV1D/RV1C compatibility.
The accessories that are fully compatible are usually based on the Clicgear click bracket mount, thread into the umbrella holder/steering knob mount, or clip onto the tube frame. But as Clicgear/Rovic is primarily a ball golf gear manufacturer, a lot of their accessories are not really useful for disc golfers.
Let’s take a look at some of the accessories that I think are most useful for disc golfers. Some of these are advertised as being RV1C/RV1S compatible with no mention of the RV1D. If something is compatible with these carts, however, it’s also compatible with the RV1D.
Rovic RV1C/RV1S seat
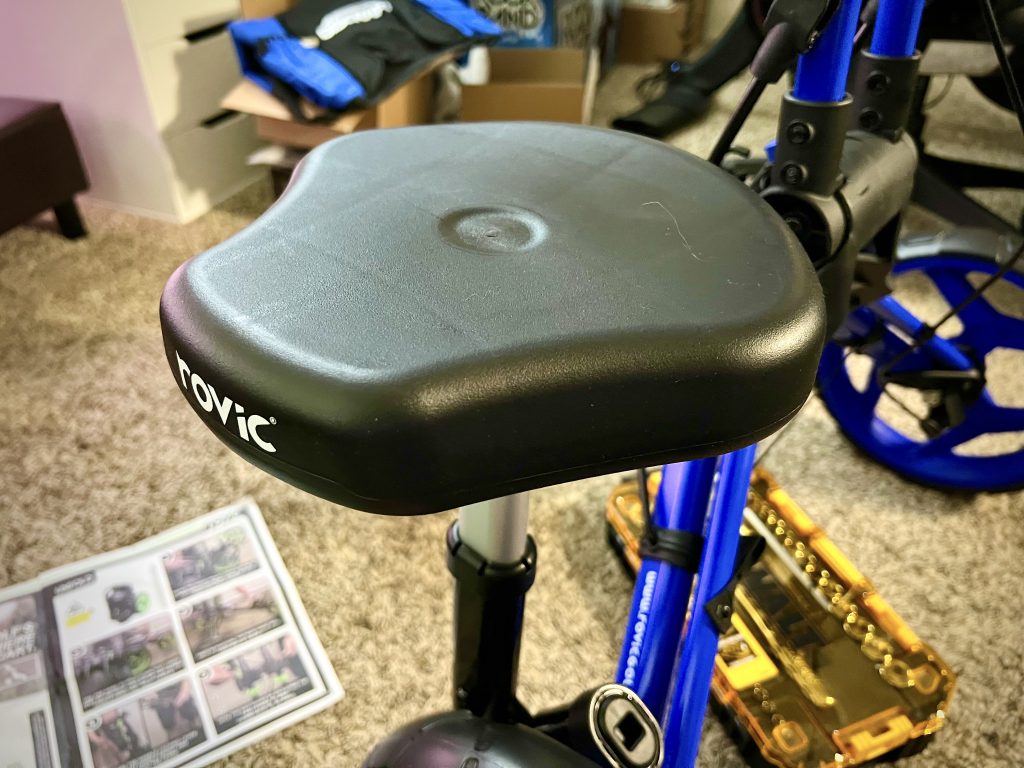
- Attaches to your push cart and provides a stable and durable platform to rest on
- Supports up to 220 lbs
- Compatible with Rovic RV1S 2.0, RV1S, RV1C, and RV1D cart models.
Last update on 2025-04-18 / Affiliate links / Images from Amazon Product Advertising API
Adding a seat may be among your first priorities and is definitely a good purchase. It’s an interesting design and supports up to 220 lbs quite well. The seat is a solid plastic molded seat without any cushioning, but there’s another accessory for that (of course there is).
The seat does require a bit of installation. The seat mount inserts between the wheel and the cart, but it’s an easy install.
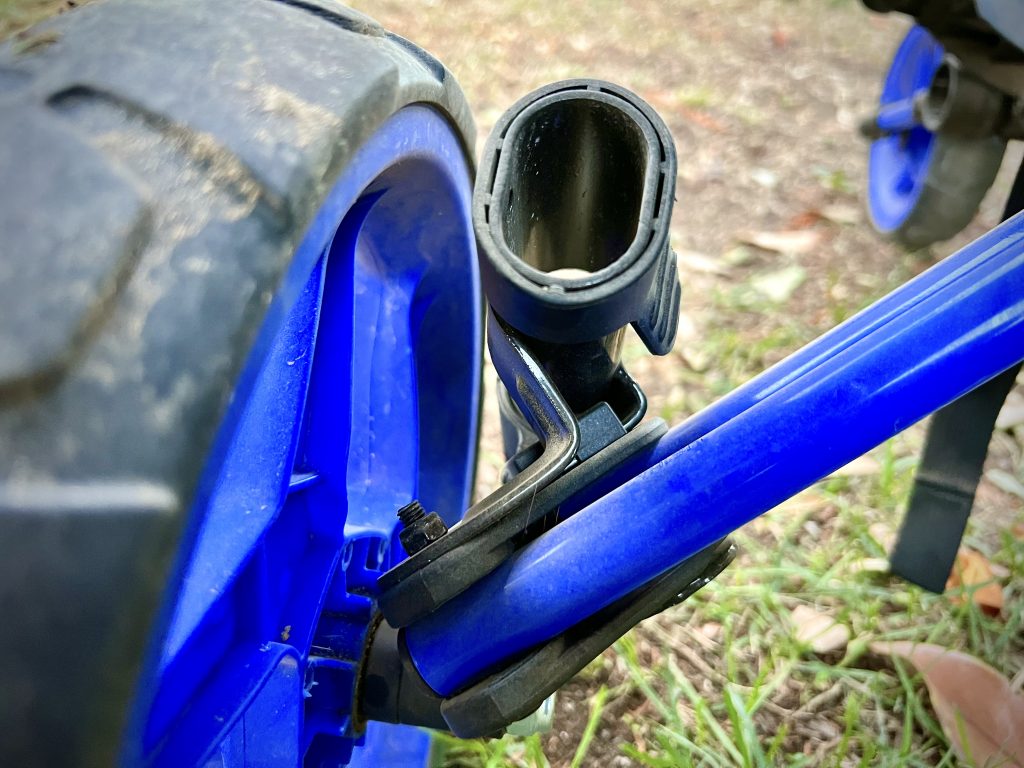
As mentioned before, the seat itself needs to be removed from the mount before collapsing the cart for storage, but it’s an easy process. the seat bracket slips into the mount and clicks into place. Removing it is also easy enough, you just push the latch button and slide out the seat bracket.
One thing I’ve noticed, however, is that if some sand or dirt gets into the seat mount and bracket it’s a bit difficult to remove the bracket from the mount. It’s only happened once or twice so far, but it’s annoying to struggle with when you’re trying to leave the parking lot.
I don’t always use the seat for that reason, but I keep it in my trunk so it’s always available if I need it for long or busy days.
Clicgear soft seat cover
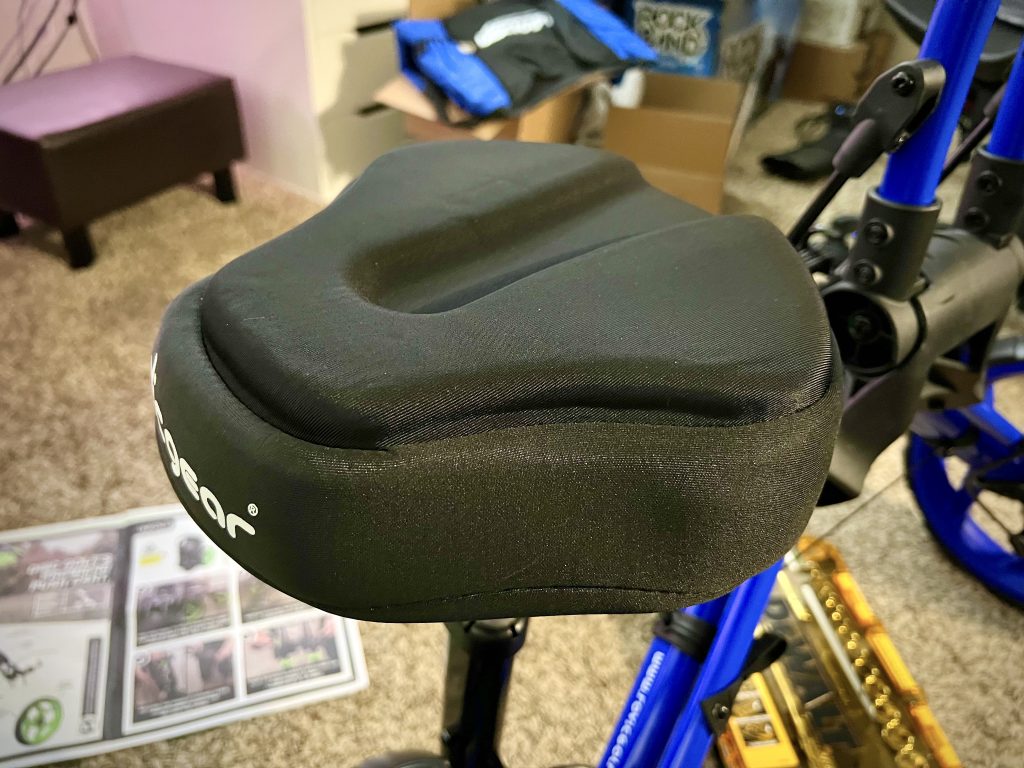
- Adds comfort to your cart’s seat
- Fits over your existing Clicgear or Rovic cart seat
- Durable soft polyester surface cloth
Last update on 2025-04-18 / Affiliate links / Images from Amazon Product Advertising API
With the hard plastic seat not being the most comfortable thing in the world, of course, Clicgear makes a seat cover with the cushioning you’re looking for. And surprisingly enough it really makes a difference.
The cushion is a slip-on gel-padded seat cover and it makes the seat way more comfortable. If you buy the seat, we would really advise buying the seat cover as well.
Umbrella angle adjuster
- Easily adjust your umbrella left, right, forward, or backward to achieve the perfect angle for both the sun’s position and the direction of the wind. This full adjustability ensures that you stay comfortable and protected from the elements, giving you control over your umbrella’s coverage throughout your round.
- Raises your umbrella height by 3 inches, providing additional headroom and making it easier to walk comfortably beneath the umbrella. The added height also gives you more space when selecting your clubs. For even more clearance, this adjuster can be used in combination with the Clicgear Spacer, making it ideal for taller golfers who need extra room.
- Perfect for rain or Designed to provide optimal protection in all weather conditions, whether it’s shielding you from the rain or offering shade on a hot, sunny day. The Clicgear Umbrella Angle Adjuster ensures you have the right coverage whenever you need it, making it a must-have accessory for year-round golfing.
Last update on 2025-04-18 / Affiliate links / Images from Amazon Product Advertising API
While the cart does come with an umbrella holder, it’s a fixed angle and isn’t terribly useful as the holder angles forward. The umbrella angle adjuster solves this, allowing for better coverage when standing at the handlebars.
We wish this was the one included with the cart, but if you play in the rain frequently you’ll definitely want this add-on.
Clicgear steering knob
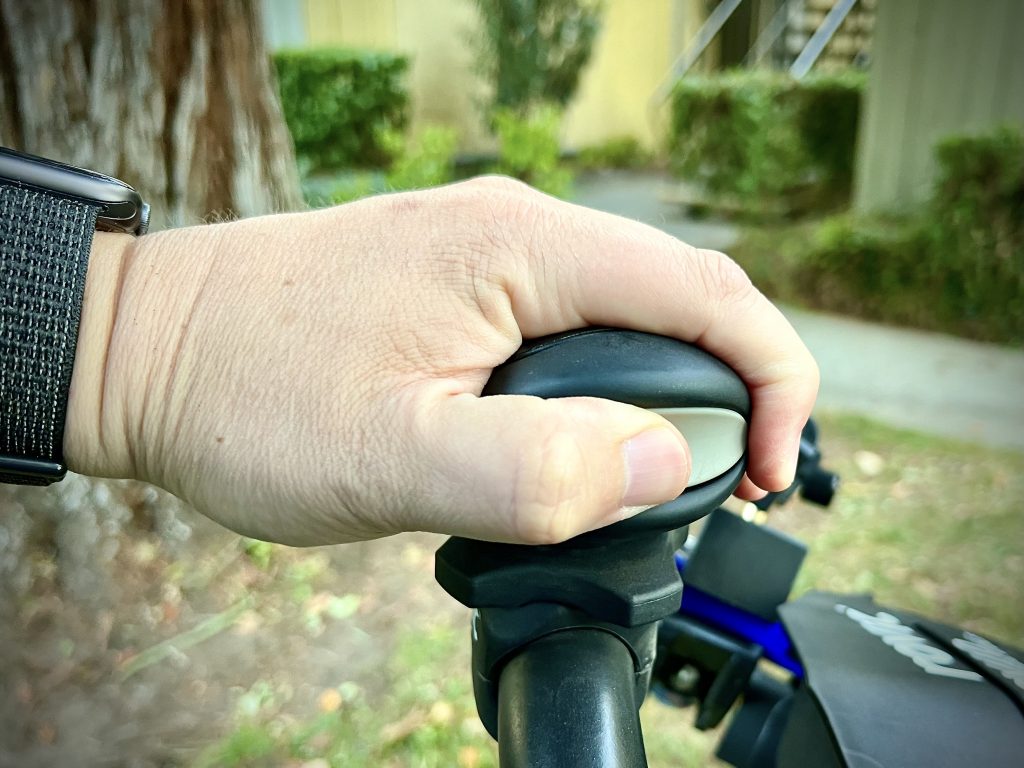
- Effortless One-Handed Steering – Enjoy a smoother, more convenient round with this handle accessory that lets you steer your push cart with just one hand. Perfect for navigating tight spots or managing your gear without breaking your stride.
- Ergonomic Design for Comfort – Featuring an ergonomically designed handle, this accessory ensures a comfortable grip whether you’re using your left or right hand. It reduces strain on your wrists and arms, making it easier to push your cart over long distances.
- Quick & Easy Installation – This handle accessory easily screws into the threaded umbrella mount on your cart’s handle. No tools required—just a simple twist and you’re ready to enhance your cart’s functionality.
Last update on 2025-04-18 / Affiliate links / Images from Amazon Product Advertising API
If you don’t need the umbrella holder, you can opt for the steering knob. While this isn’t necessary it does make one-handed control of the cart much easier.
This knob screws onto the center of the handlebar and freely swivels around to let you grab it with either hand and steer, turn, push and pull the cart easily.
I’m glad I picked this up. While I don’t use it exclusively, I do use it very often to quickly swivel the cart in different directions by pushing down on the knob and lifting the front wheel to spin on the back wheels.
It literally is just a spinning knob and is absolutely not mandatory, but I’m glad to have it on my cart.
Clicgear mesh storage net
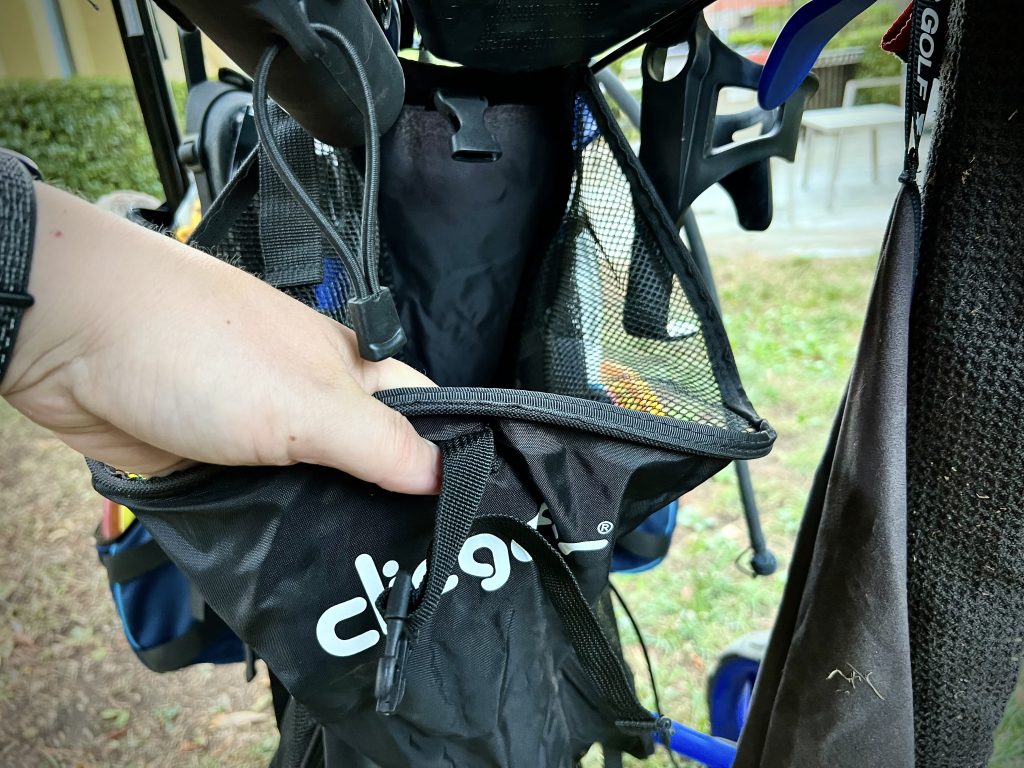
- Extra-Large Storage for On-Course Essentials – Bring everything you need for your round with this spacious storage bag. Perfect for holding jackets, backpacks, extra shoes, snacks, beverages, and more—so you’re always prepared, no matter the conditions.
- Durable, Easy-Care Nylon Mesh Construction – Made from tough nylon mesh, this bag is built to withstand regular use while allowing airflow to keep items fresh. It’s lightweight, easy to clean, and built to last through countless rounds.
- Stays Secure When Cart is Folded – No need to remove the bag after your game—this storage solution is designed to stay in place even when your cart is folded, making packing up and storing your cart faster and more convenient.
Last update on 2025-04-18 / Affiliate links / Images from Amazon Product Advertising API
If you want to add extra storage for things like jackets and whatnot, the mesh storage net is a great add-on. It mounts to the back of the main cart structure and stores quite a bit. Best of all you don’t have to take it off in order to collapse the cart.
This is a great all-purpose accessory that doesn’t really impact use of the cart. If your backpack has plenty of storage you may not need it, but I do like not needing to jam a jacket into my bag when it gets warm during the round.
Rovic RV1C/RV1S cooler bag
- Stores your cold drinks and snacks while on the course
- Insulated lower pocket stores up to six cans
- Upper pocket has plenty of room for snacks
Last update on 2025-04-18 / Affiliate links / Images from Amazon Product Advertising API
If you like to pack a bunch of beverages for your round you may want to opt for the cooler bag instead of the mesh net. The cooler bag will mount to the bottom of the main tube and holds six cans in the bottom cooler pocket.
Thankfully the top pocket also offers some storage, but perhaps not enough for a jacket. There may be a way of getting both the net and cooler to mount, but I haven’t picked up the cooler yet since I don’t typically carry multiple cans.
Rovic RV1C/RV1S wheel cover
- Waterproof nylon elastic cover wraps around all three wheels of your Rovic cart
- Ideal for transporting your cart and keeping your vehicle clean
- Great for off season storage
Last update on 2025-04-18 / Affiliate links / Images from Amazon Product Advertising API
If you want to keep your trunk clean after a round, you can get a wheel cover to keep mud and dirt in check. I took to cleaning my Zuca tires by hand after a round with a cleaning brush because they tracked in so much mud and dirt. Drove my wife crazy.
With the wheel cover you can keep both your car interior and house clean without needing to clean your tires after every round. It’s yet one more thing to take off and put back on but it’s possibly a good option for some people.
Rovic RV1C/RV1S shoe brush
- The Clicgear Shoe Brush is an easy way to keep shoes and club face clean
- Attaches to the LEFT hand rear wheel strut
- Durable extra stiff bristles
Last update on 2025-04-18 / Affiliate links / Images from Amazon Product Advertising API
If you like to keep your shoes clean you can attach a shoe brush to the left wheel strut. It’s an easy way to make sure you’re not tracking in dust and dirt into your car after the round.
Clicgear cooler tube
- Keeps Drinks Chilled for the Entire Round – Enjoy cold, refreshing beverages throughout your entire game. The insulated Clicgear Cooler Tube is built to maintain the perfect temperature, keeping your drinks cool during those hot summer rounds.
- Spacious Storage for Your Favorite Beverages – Whether you’re craving a cold soda or staying hydrated with water, this cooler holds two 12 oz cans or one 32 oz bottle, providing ample space for your preferred drink size to keep you refreshed all round.
- Durable, Insulated, and Waterproof Material – Crafted from premium, insulated waterproof nylon, the Clicgear Cooler Tube is built to withstand the elements.
Last update on 2025-04-18 / Affiliate links / Images from Amazon Product Advertising API
If you don’t need a full six-pack cooler but want something to carry a larger bottle and keep it chilled, the Clicgear cooler tube is a good option. It will hang from the tube frame and can hold up to a 32 oz bottle.
Clicgear rangefinder/valuables bag
- Convenient Access to Rangefinder & Essentials – Keep your rangefinder, phone, wallet, or other small valuables within arm’s reach. This thoughtfully designed bag makes it easy to access your gear without slowing down your game.
- Durable, Insulated & Weather-Resistant – Crafted from high-quality insulated waterproof nylon, this bag protects your valuables from rain, moisture, and temperature changes—ideal for unpredictable conditions on the course.
- Secure Yet Quick-Access Closure Options – Featuring both zippered and magnetic flap closures, you can choose the best way to secure your items while still enjoying fast, hassle-free access whenever you need it.
Last update on 2025-04-18 / Affiliate links / Images from Amazon Product Advertising API
If you carry a disc golf range finder with you, Clicgear has a pouch for that. It comes with a Clicgear Accessory Tab so you can mount it wherever you want on your cart.
Even if you don’t use a rangefinder it’s a good bag to carry keys or anything else.
Clicgear Mitt
- KEEPS HANDS WARM – Plush lining keeps your hands toasty in winter weather conditions
- KEEPS HANDS DRY – Waterproof and windproof to for maximum comfort
- FITS ALL CART BRANDS – Universally attaches to any brand of push cart in just seconds
Last update on 2025-04-18 / Affiliate links / Images from Amazon Product Advertising API
For disc golfers in very cold environments, there’s the Clicgear Mitt. This is an add-on that allows you to push your cart and keep your hands safe from the cold. There are pockets for heat packs so you can keep even warmer.
HomeMount portable speaker mount for golf carts
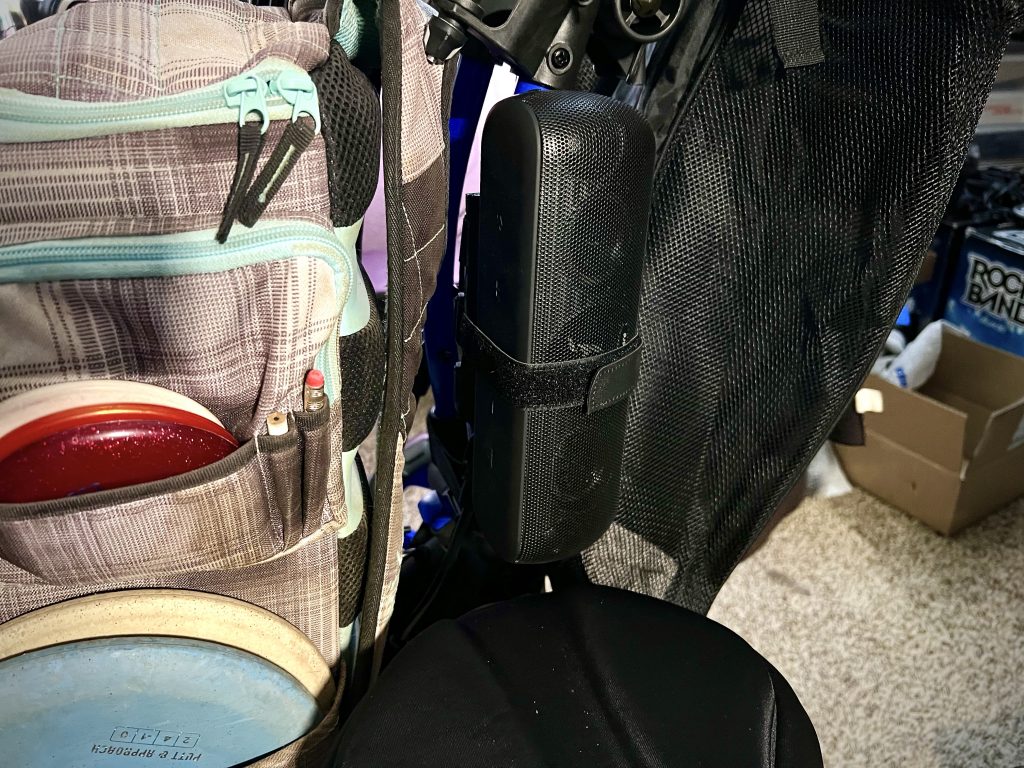
This isn’t a Clicgear/Rovic official accessory, but they don’t make anything specifically for the Rovic carts to strap a Bluetooth speaker to the cart. Sure, you could throw it in a mesh bag, put a tiny one in the plastic storage compartment, or toss it in a cooler bag, but none of those are great options for sound.
I found this HomeMount portable speaker mount for golf carts and it fits my Soundcore Motion+ Bluetooth speaker perfectly. I can’t leave the speaker mounted when the cart is collapsed, but strapping it in isn’t much of a hassle.
How can you mount your phone to a Rovic RV1D disc golf cart?
There isn’t a good accessory from Clicgear for mounting your phone to the cart. While they make a GPS mount it’s really not suitable for a smartphone.
Instead, I’ve used some basic filmmaking gear so I can mount any phone to my cart easily and not worry about it coming loose. The benefit to this sort of setup is that I can also use it for filming out on the course easily for form checks and whatnot.
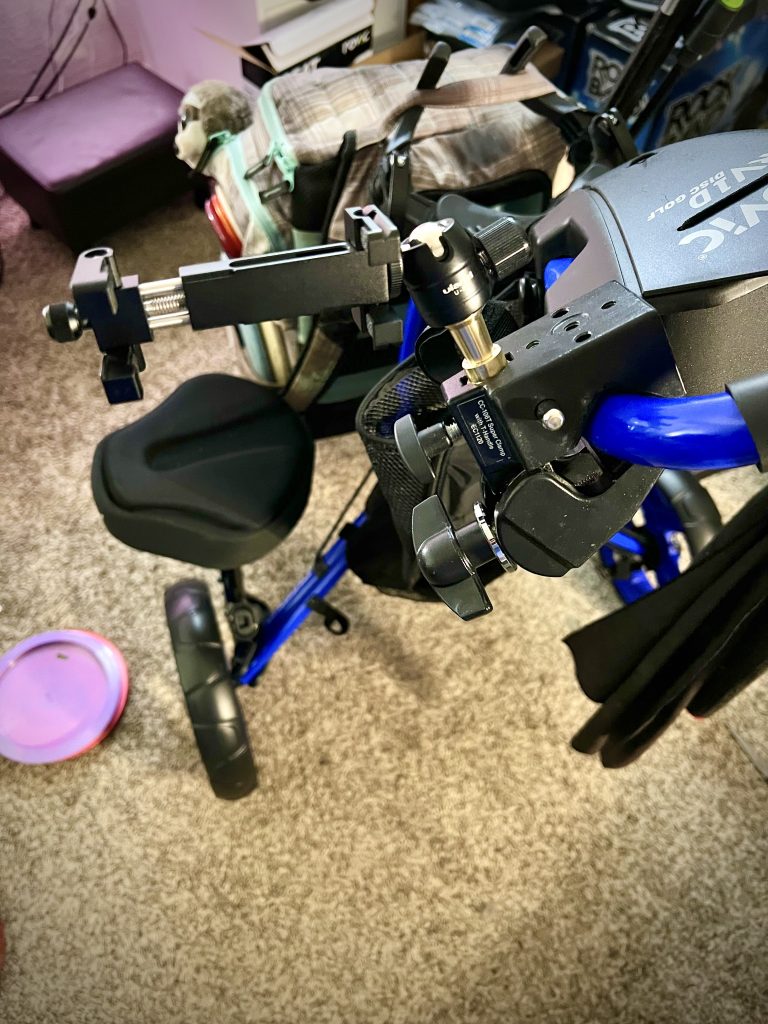
It starts with what’s called a “super clamp”. I’ve had this Impact Super Clamp and it turns out that it stays put quite well on the Rovic frame tube. Just remove the flat inserts to notch out the clamp and it won’t budge once it’s cranked down.
The super clamp comes with a threaded mount that you can use to add a ball head to. Mini ball head mounts aren’t too expensive but it does need to keep its tension. These SmallRig mini ball heads are a good option.
Finally, you’ll need a good phone mount. I love this Ulanzi phone mount. It collapses flat, is very sturdy, and holds almost any phone without problems.
This setup would work for mounting almost anything. GoPro, 360 camera, even small mirrorless cameras. You’d want to upgrade the ball head for anything larger than a phone, but it would absolutely work.
If you don’t care about filming yourself easily or are okay with more limited positioning options, a good option for a phone holder would be this Black Harp silicone phone holder for push carts.
It may not be as secure as my setup, but for considerably less, it should get the job done. You may notice issues with some larger phones like iPhones of the Pro Max variety
What don’t I like about the Rovic RV1D?
There really isn’t a lot to dislike about this cart. I would say that the number one thing would be the setup required before and after a round. It takes a few extra minutes to get everything all set up and while it’s not significant, it’s not nothing.
Storing the Rovic takes twice the amount of space of a Zuca–assuming you keep your backpack in the Zuca. It’s nice that the two aren’t bound together, but if you’re strapped for space you’ll have to figure something out.
If you want to add extra disc space to the RV1D you need to either buy a bigger backpack or just throw them loose in the mesh bag or something. You could probably custom-fabricate something to hang off the back, but as of this point, there’s nothing off-the-shelf available. Rovic, take note.
Final thoughts
After using the Rovic RV1D disc golf cart for some time now, I’ve really come to enjoy the experience with it. Yes, there’s a bit of setup and breakdown required. And yes, I had to buy a whole new backpack to add back storage space. But all of the benefits of the cart far outweigh the drawbacks in my opinion.
This cart has made it much easier on my pain points and makes rounds more enjoyable. Not everyone may feel the same way, but for those of you who are all about the cart life, the Rovic RV1D is a fantastic option.
Are there any questions you have about this cart? Anything we missed or you’re curious about? Leave a comment down below and I’ll do my best to answer them!


Super thorough review!